Your Home’s Invisible Shield—Demystified with Precision, Science, and Actionable Steps for Every Critical Junction
Water doesn’t negotiate. A hairline gap behind a window frame, a misplaced nail in step flashing, or a sealed counter-flashing joint can unleash cascading consequences: rotting structural elements, mold growth within wall cavities, compromised insulation, and costly repairs. Yet weatherproofing—the deliberate, science-backed system of barriers designed to manage moisture—is consistently undervalued until failure strikes. This guide transforms ambiguity into clarity. Grounded in building science principles reflected in the International Residential Code (IRC), ASTM standards, and decades of moisture management research, we deliver a comprehensive methodology for installing, repairing, and maintaining flashing across every vulnerable point of your home’s envelope. Whether you’re preparing for a window retrofit, diagnosing a leak, or seeking foundational knowledge, this resource equips you with actionable understanding to create a resilient, dry, and durable home. No fluff. No oversimplification. Just clear, integrated guidance.
Introduction: The Unseen Battle Against Moisture Intrusion
Every home exists in constant dialogue with its environment. Rain, snow, humidity, wind-driven spray, and interior vapor pressure relentlessly test the building envelope—the physical separator between conditioned interior space and the external world. Exterior cladding (siding, brick, shingles) serves as the first responder, shedding bulk precipitation. But physics guarantees infiltration: capillary action wicks moisture through microscopic pores; wind pressure forces water horizontally into seams; thermal cycling creates expansion gaps; ice dams pool meltwater against vulnerable edges. This is not a flaw—it is an inevitability of material science and environmental dynamics. Therefore, the foundational principle of modern building science is not preventing all water entry (an impossible goal), but managing inevitable moisture intrusion through redundant, intelligently layered defenses.
Flashing—the thin, continuous membranes or formed materials installed at joints, penetrations, transitions, and discontinuities—is the connective tissue of this defense system. Properly executed, flashing intercepts water bypassing the primary cladding, redirects it along safe pathways, and expels it harmlessly to the exterior. Improperly executed, it becomes a conduit for damage. Field studies by building envelope professionals consistently identify flashing integration errors as a leading cause in the majority of documented water intrusion cases. These failures rarely stem from material inadequacy alone; they arise from misunderstood principles, skipped integration steps, or well-intentioned but counterproductive “sealing” attempts that trap moisture inside assemblies. This guide dismantles those misconceptions. We move beyond fragmented tips (“use step flashing here”) to establish a unified mental model—the Three-Layer Defense Framework—applicable to roofs, walls, windows, chimneys, and every critical junction. You will learn not only how to install flashing correctly but why each detail matters, how materials interact, where regional codes impose specific requirements, and how to diagnose issues before they escalate. This knowledge is your most valuable tool for protecting your largest investment.
The Three-Layer Defense Framework: Building Science Made Actionable
Before handling a single piece of metal or roll of membrane, internalize this foundational framework. Developed through moisture modeling, laboratory testing, and analysis of building assemblies, it forms the backbone of resilient design principles endorsed by building science institutions and industry associations. Forget the outdated notion of a single “waterproof seal.” True weatherproofing relies on redundancy. If Layer 1 is compromised (and it will be, eventually), Layer 2 catches the intrusion. If Layer 2 is momentarily overwhelmed, Layer 3 ensures drainage and drying. This system prioritizes resilience over fragile perfection.
Layer 1: The Primary Barrier (Cladding and Surface Deflectors)
This is the visible skin of your home: asphalt shingles, metal roofing, vinyl siding, brick veneer, stucco, or wood clapboards. Its primary function is to shed the vast majority of bulk water. Complementary surface elements enhance this role:
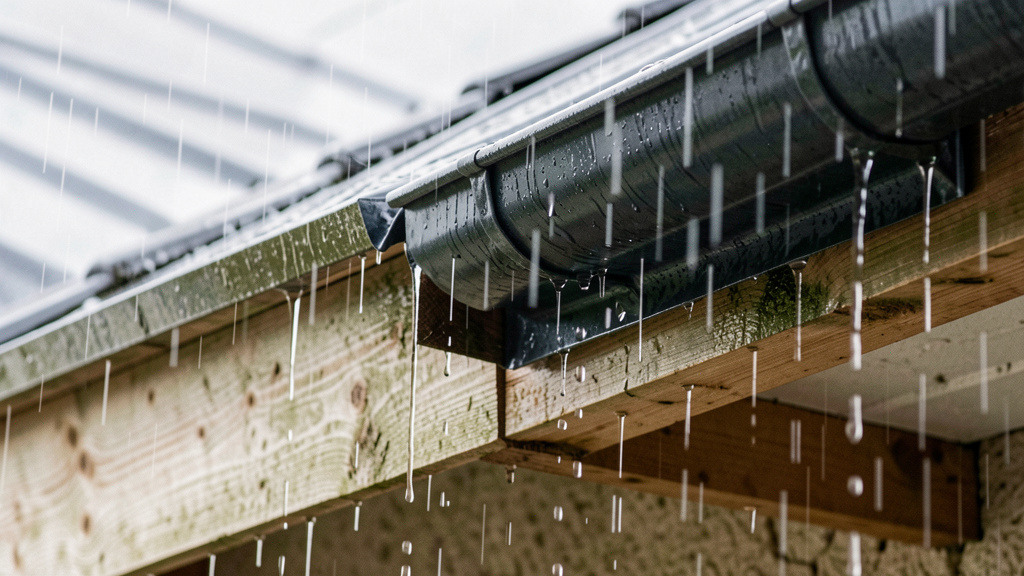
– Drip Edges: Metal strips at roof eaves and rakes that force water to drop clear of the fascia and sheathing, preventing capillary wicking back under shingles.
– Kick-Out Flashing: A small, angled piece at the termination of step flashing where a roof meets a wall, directing water away from the wall surface.
– Soffit Vents with Baffles: While primarily for ventilation, properly installed baffles prevent wind-driven rain from entering the attic through soffit vents.
Why Layer 1 Alone Fails: Cladding is inherently discontinuous. Fastener holes, lap joints, material seams, and thermal movement create pathways. Sealants degrade under UV exposure. Wind pressures exceed design loads during storms. A hail impact cracks a shingle. Layer 1 is sacrificial—it takes the initial hit but must be backed by deeper defenses. Relying solely on cladding or surface sealants is a high-stakes gamble with predictable outcomes.
Layer 2: The Secondary Barrier (Water-Resistive Barrier and Integrated Flashing)
Hidden beneath the cladding lies the true workhorse: the Water-Resistive Barrier (WRB). Commonly known as housewrap (e.g., Tyvek HomeWrap, Barricade Wrap), asphalt-saturated felt (Type I or II), or fluid-applied membranes (e.g., Henry Blueskin, Prosoco R-Guard), the WRB catches water penetrating Layer 1 and channels it downward. But the WRB is only as effective as its integration with flashing. This is the critical nexus where most vulnerabilities occur.
The Integration Imperative: Flashing components must be layered shingle-style with the WRB—each piece overlapping the one below it, mirroring how roof shingles shed water. For example:
– At a window head: The head flashing laps over the WRB above the window and over the jamb flashing tapes.
– At a roof-wall junction: The vertical leg of step flashing is installed behind the wall WRB, while the horizontal leg sits under the roof underlayment (which acts as the roof’s WRB).
– At a pipe penetration: Flashing membrane laps over the WRB above the pipe and under the WRB below it.
This shingle-lap principle ensures gravity directs water outward. Reversing overlaps (e.g., taping WRB over flashing) creates a funnel directing water into the wall cavity. Integration isn’t optional—it’s the core function of Layer 2. Compatible tapes (e.g., Tescon Vana, Siga Wigluv) seal seams and flashing-to-WRB joints, but mechanical integration (lapping) remains paramount. Sealants alone cannot compensate for poor lapping sequence.
Layer 3: The Drainage Plane and Drying Potential
Even with Layers 1 and 2 functioning optimally, minor moisture intrusion occurs. Layer 3 provides the escape route. It consists of two interdependent elements:
1. The Drainage Plane: A small, continuous air gap (typically 1/4″ to 3/8″) between the WRB and the back of the cladding. Created by:
– Furring strips (wood or plastic) installed vertically over the WRB before siding.
– Textured or dimpled WRBs (e.g., Tyvek DrainWrap, Delta-Drain).
– Rainscreen clips and channels for panelized siding.
This gap allows trapped water to drain downward unimpeded and exit through weep holes (in brick veneer) or open bottom edges (in siding systems).
2. Drying Potential: The assembly’s ability to release moisture vapor. Achieved through:
– Vapor-permeable WRBs (allowing walls to “breathe” outward).
– Strategic ventilation (soffit/ridge vents in attics, vented cladding cavities).
– Material selection aligned with climate considerations (e.g., avoiding impermeable interior barriers in mixed/humid climates per IRC guidance).
Critical Insight: Drainage and drying are distinct but complementary. Drainage handles liquid water; drying handles vapor. A wall without a drainage plane may drain slowly, but trapped liquid prolongs wetting cycles, overwhelming drying capacity and accelerating decay. Conversely, a wall with excellent drainage but no drying path risks condensation buildup. Layer 3 transforms the assembly from a moisture trap into a resilient, self-correcting system.
The Fundamental Principle: Effective weatherproofing manages water through redundancy and directional flow—not by attempting an impossible, permanent seal. Water will enter; the system must guide it out safely. This mindset shift—from “seal everything” to “channel and drain”—prevents catastrophic errors, such as sealing the bottom of a flashing assembly (trapping water) or using incompatible sealants that fail prematurely.
This framework applies universally. Whether flashing a chimney in Minnesota, installing a window in Florida, or sealing a vent pipe in California, Layers 1, 2, and 3 provide the diagnostic lens. In the following sections, we apply this lens to specific scenarios, detailing materials, precise installation sequences, regional adaptations, and diagnostic approaches. But first, we must select the right tools for the job.
Choosing the Right Flashing Materials: A Comprehensive, Application-Specific Guide
Material selection is a calculated decision based on location exposure, adjacent materials, climate severity, expected service life, and compatibility with the WRB system. Choosing incorrectly invites premature failure through corrosion, chemical reaction, UV degradation, or physical fatigue. Below is a detailed comparison grounded in performance standards and field experience. Always verify compliance with local building code amendments.
Metal Flashing: Rigidity, Longevity, and Critical Nuances
Metal flashing offers durability and formability for complex geometries. However, material chemistry dictates suitability. Two overarching principles govern all metal flashing:
-
Galvanic Corrosion Prevention: When dissimilar metals contact in the presence of moisture, an electrochemical reaction accelerates corrosion of the less “noble” metal. Consult a galvanic series chart. Critical rules:
- Aluminum flashing must never contact copper roofing, copper gutters, or pressure-treated wood (alkaline chemicals cause rapid pitting). Use a non-absorbent separator (butyl tape, plastic shim).
- Galvanized steel corrodes rapidly when in contact with copper or aluminum. Avoid mixing.
- Stainless steel (especially 316 grade) is highly noble and generally safe adjacent to other metals but is expensive.
- Best Practice: Use the same metal throughout a single flashing assembly. If unavoidable, isolate dissimilar metals with a barrier membrane rated for long-term separation.
-
Minimum Thickness Standards (Per IRC R703.4):
- Galvanized Steel: 26 gauge (0.0185″ / 0.47 mm) minimum
- Aluminum: 0.019″ (0.48 mm) minimum
- Copper: 16 oz (0.0216″ / 0.55 mm) minimum
- Stainless Steel: 28 gauge (0.015″ / 0.38 mm) minimum
Thinner materials dent easily, fatigue at bends, and offer reduced service life. Never substitute under-gauge materials for code-compliant flashing.
| Material | Ideal Applications | Service Life | Critical Limitations & Compatibility Notes | Cost Tier | Climate Considerations |
|---|---|---|---|---|---|
| Galvanized Steel | Roof valleys (under shingles), drip edges, step flashing in dry inland climates | 20-40 years | High corrosion risk in coastal (salt air), high-humidity, or acid-rain areas. Avoid contact with copper, aluminum, or masonry mortar (alkaline). Rust stains are common. | Budget | Unsuitable for coastal construction zones per FEMA guidelines. |
| Aluminum | Window/door heads & jambs, sidewall step flashing (non-masonry), roof edges, kick-out flashing | 30-50 years | NEVER use on masonry (brick, stone, stucco lath)—alkaline mortar causes severe corrosion. Avoid contact with pressure-treated wood (ACQ chemicals). Lightweight; dents easily. | Mid-Range | Excellent for most inland US climates. Avoid coastal salt spray zones. |
| Copper | Chimneys (masonry & framed), complex roof details (turrets, dormers), historic restoration, valleys in high-visibility areas | 50-100+ years | Expensive. Requires skilled soldering for seams. Develops green patina (aesthetic consideration). Compatible with most materials except aluminum (severe galvanic corrosion). | Premium | Ideal for all climates, including coastal. Patina provides self-protecting layer. |
| Stainless Steel (304/316) | Coastal zones, chemical exposure areas (pool enclosures), critical details (chimney counter-flashing), areas requiring maximum longevity | 50+ years | 316 grade (“marine grade”) essential for salt-air exposure. Harder to cut/form than aluminum/copper; requires aviation snips or shear. Higher initial cost justified by longevity in harsh environments. | Premium | Often required within coastal high-velocity wind zones per local amendments. |
| Lead-Coated Copper | Historic restoration where lead appearance is required, complex custom shapes | 75+ years | Lead component requires EPA-compliant handling (gloves, mask) during cutting; disposal as hazardous waste. Avoid in areas with children/pets due to toxicity risk. Banned in some jurisdictions. | Niche | Similar to copper; lead coating slows initial patina formation. |
| Terne-Coated Stainless | Architectural details requiring solderability of lead with stainless durability | 75+ years | Modern alternative to lead; terne coating (tin-lead alloy) allows soldering. Less toxic than pure lead but still requires careful handling. | Premium/Niche | Excellent coastal performance; combines stainless corrosion resistance with traditional workability. |
Illustrative Scenario: A homeowner in a coastal region installed aluminum step flashing against a brick chimney chase. Within several years, visible corrosion appeared at the mortar joints. Water tracked behind the flashing into the wall cavity, causing structural damage requiring extensive remediation. Solution: Complete removal, replacement with 316 stainless steel flashing isolated from the brick with a butyl tape barrier, and repair of damaged sheathing. This underscores the importance of selecting corrosion-resistant materials appropriate for the specific environment and adjacent materials.
Flexible Flashing Membranes: Peel-and-Stick Precision
These self-adhering sheets are indispensable for irregular shapes, retrofits, sealing seams, and areas requiring aggressive adhesion. They consist of rubberized asphalt, butyl, or SBS-modified bitumen backing with a release paper. Key categories:
-
Roof Underlayment Membranes (e.g., Grace Ice & Water Shield, GAF StormGuard):
- Purpose: Primary WRB for roofs; critical for eaves, valleys, rakes, and penetrations in climates prone to ice dams.
- Key Specs: Look for ASTM D1970 compliance. Minimum 24″ width at eaves (IRC R905.2.7); 36″ in heavy snow zones. UV resistance rating if exposed >30 days before shingling.
- Installation Nuance: Surface must be clean, dry, and >40°F (4°C). Peel release paper gradually while pressing firmly with a roller to ensure full adhesion and eliminate air pockets. Overlap seams by 3-4 inches; some require compatible seam tape. Never stretch the membrane—it will contract later, creating gaps.
- Common Mistake: Installing over dusty OSB sheathing. Wipe sheathing with a damp cloth first. Installing in cold weather without warming the roll (store indoors overnight).
-
Flashing Tapes & Membranes (e.g., Pro Clima Tescon Vana, Siga Wigluv, Henry Blueskin):
- Purpose: Sealing WRB seams, flashing window/door rough openings, integrating step flashing with WRB, sealing pipe penetrations.
- Key Specs: Vapor permeability (perms) matters! For walls needing to dry outward (most climates), choose >5 perms (e.g., Tescon Vana: 35 perms). For areas requiring an air barrier seal (e.g., window flange), lower perm ratings may be acceptable. Adhesion strength to specific substrates (wood, metal, concrete) is critical—check manufacturer data sheets.
- Installation Nuance: Clean substrate with isopropyl alcohol wipe for maximum adhesion. Apply firm, consistent pressure with a J-roller. For window sill pans, form a slight outward slope (1/4″ per foot) before the membrane sets. Critical: Leave release paper on areas where window frame contacts tape to prevent bonding (allows for thermal expansion).
- Budget Alternative: High-quality butyl tape (e.g., Vycor Block) for sealing metal flashing seams or small gaps. Less versatile than full membranes but cost-effective for targeted use.
-
Fluid-Applied Flashing (e.g., Prosoco R-Guard, Henry Air-Bloc):
- Purpose: Creating seamless, monolithic barriers on complex geometries (curved walls, irregular penetrations), historic masonry restoration, or as a WRB replacement.
- Key Specs: Typically 2-part systems requiring precise mixing. Applied by brush, roller, or spray. Cures to a flexible, rubber-like membrane. Excellent adhesion to difficult substrates (concrete, CMU).
- Installation Nuance: Surface prep is non-negotiable—must be clean, sound, and often primed. Apply in multiple thin coats per manufacturer specs; thick coats crack. Requires skilled application. Ideal for professional use but accessible to meticulous DIYers.
- Advantage: Zero seams = zero seam failure points. Conforms perfectly to contours.
Rigid & Composite Alternatives: Specialized Solutions
-
PVC Flashing (e.g., Zurn Z-Flashing, GenFlex):
- Ideal For: Masonry applications (chimneys, brick walls), where metal would corrode from alkaline mortar. Also common for commercial parapets.
- Advantages: Chemically inert to mortar, lightweight, easy to cut with utility knife. Can be heat-welded for seamless joints.
- Limitation: Less rigid than metal; may require additional support on long spans. UV degradation if low-quality; specify UV-stabilized grades.
-
EPDM Rubber Flashing (e.g., for pipe boots):
- Ideal For: Round penetrations (plumbing vents, gas lines). Pre-formed boots with integrated flanges.
- Advantage: Highly flexible, accommodates pipe movement/vibration. Long UV resistance.
- Critical Tip: Slide boot under WRB above penetration and over WRB below before pipe is installed whenever possible. For retrofits, use boots with wide, adhesive-backed flanges designed to bond to existing surfaces. Seal top/sides with compatible sealant; leave bottom unsealed for drainage.
-
Composite Flashing (e.g., Grace Vycor Plus, Barricade Flashing):
- Ideal For: Window/door sill pans, site-built flashing where flexibility and tear resistance are needed.
- Composition: Rubberized asphalt core laminated between polyester scrims and release films.
- Advantage: Combines peel-and-stick ease with high puncture resistance. Often includes integrated end dams for sill pans.
Material Selection Decision Path:
1. Identify the Location & Exposure: High water volume (valley)? Masonry contact? Coastal salt air? UV exposure? Thermal movement?
2. Check Adjacent Materials: Masonry? Pressure-treated wood? Copper roof? Dissimilar metals present?
3. Consult Local Code Requirements: Coastal zone? Historic district? Specific material mandates?
4. Assess Practical Constraints: Can you solder copper? Is the area accessible for meticulous membrane application? Retrofit limitations?
5. Prioritize Integration: Will this material bond/lap correctly with your chosen WRB? Does the manufacturer provide compatibility data?
Example Path: Flashing a brick chimney on a coastal home. Decision Path: 316 Stainless Steel step flashing (corrosion resistance) + PVC counter-flashing embedded in reglet (alkali resistance, avoids metal-on-masonry corrosion). Avoid Path: Aluminum (corrodes on brick + salt air), Copper (galvanic risk if near aluminum components).
Step-by-Step Installation Guides: Applying the Framework to Critical Vulnerabilities
This section translates the Three-Layer Framework into precise, actionable sequences for the most common—and most failure-prone—scenarios. Each guide includes the objective within the framework, required tools/materials, a pre-installation checklist (often overlooked but critical), the step-by-step procedure with integration points highlighted, common mistakes analyzed, and verification tips. Safety first: Always use fall protection on roofs, wear cut-resistant gloves with metal flashing, and verify no electrical lines are near penetration points.
Roof-Wall Intersections: Mastering Step Flashing and Counter-Flashing
This junction is consistently identified as a high-risk area for moisture intrusion. Wind-driven rain exploits gaps between roof and wall cladding. Proper step flashing integrated with the WRB is essential.
Objective within Framework:
– Layer 1: Shingles shed bulk water.
– Layer 2: Step flashing integrated behind wall WRB and under roof underlayment catches bypass water; counter-flashing (on masonry) protects the top edge.
– Layer 3: Roof slope provides drainage; kick-out flashing directs water away from wall surface.
Tools & Materials:
– Step flashing pieces (5″x5″ or 6″x6″ L-shaped; material per selection guide)
– Counter-flashing (continuous strip; copper or PVC for masonry)
– Roofing nails (7/8″ to 1″ long; short enough to avoid penetrating roof deck)
– Hammer or pneumatic nailer
– Utility knife, tin snips, chalk line
– Compatible sealant (non-hardening polyurethane for counter-flashing reglet)
– Safety harness, roof brackets, gloves, eye protection
– Recommended: Kick-out flashing piece at termination point
Pre-Installation Checklist (DO NOT SKIP):
– [ ] Remove existing shingles and damaged flashing back to sound sheathing.
– [ ] Inspect roof deck and wall sheathing for damage. Repair/replace compromised wood.
– [ ] Verify wall WRB is intact. If damaged or missing at junction, repair WRB before proceeding. Cut a vertical slit in WRB at the roof-wall line if needed for flashing insertion.
– [ ] Snap a chalk line on the wall sheathing 1/2″ above the planned roof surface line to guide vertical leg placement.
– [ ] Clean all surfaces thoroughly—dust, oil, or debris prevents adhesion.
Step-by-Step Procedure:
1. Prepare Roof Deck: Install roof underlayment (felt or synthetic WRB) up to the wall. Extend underlayment up the wall sheathing by at least 6 inches. This underlayment is the roof’s Layer 2 component.
2. Install First Step Flashing Piece:
– Position the L-shaped flashing so the vertical leg is flat against the wall sheathing.
– CRITICAL INTEGRATION POINT: Tuck the vertical leg behind the wall WRB. If WRB is already installed, carefully slit it vertically along the chalk line, insert the flashing leg behind it, and seal the slit immediately with WRB-compatible tape (e.g., Tescon Vana).
– Place the horizontal leg flat on the roof deck, aligned with the chalk line.
– Nail only through the horizontal leg, using two nails placed high enough to be covered by the next shingle course. Never nail through the vertical leg—this creates direct water pathways into the wall.
3. Install Shingle Course: Lay the first course of shingles over the horizontal leg of the flashing. Ensure shingles extend slightly past the wall line.
4. Repeat Sequence: For each subsequent shingle course:
– Install a new step flashing piece, overlapping the previous piece’s horizontal leg by at least 2 inches (shingle-style overlap).
– Insert the new vertical leg behind the wall WRB (sealing the slit if necessary).
– Nail only the horizontal leg.
– Install the shingle course over it.
Continue this “flash-shingle-flash-shingle” sequence up the entire wall.
5. Install Kick-Out Flashing (Highly Recommended): At the bottom termination point where the roof meets the wall (especially if wall extends below roof line), install a pre-formed or site-made kick-out flashing. This small angled piece directs water away from the wall surface and into the gutter, preventing staining and moisture wicking up the wall cladding.
6. Counter-Flashing (Masonry Walls Only):
– After step flashing is complete, cut a reglet (groove) into the mortar joint of the brick/stone wall, approximately 1 inch deep and 1/2 inch wide, starting just above the top of the step flashing.
– Insert the top edge of the continuous counter-flashing strip into the reglet.
– Seal the reglet with a non-hardening, flexible sealant (e.g., polyurethane or butyl rope). Do not use rigid mortar—building movement will crack it.
– Bend the counter-flashing outward slightly so its bottom edge overlaps the top piece of step flashing by 1-2 inches. Crucially, do NOT seal the bottom edge of the counter-flashing. This overlap must remain open to allow any water behind the counter-flashing to drain out over the step flashing.
– For Framed Walls: Counter-flashing is typically not used. Instead, ensure the wall cladding (siding) starts above the roof plane with a proper drip cap flashing integrated into the WRB system.
Common Mistakes to Avoid:
– Continuous Flashing Instead of Step Flashing: Installing one long piece creates a dam. Water entering at the top has no escape route and flows behind the flashing into the wall. Step flashing allows each segment to drain independently.
– Flashing Installed Over the WRB: If the vertical leg is placed on top of the wall WRB, water running down the WRB flows behind the flashing. The WRB must lap over the flashing leg.
– Nailing Through Vertical Leg: Creates direct holes for water entry. Nails belong only on the horizontal leg, covered by shingles.
– Sealing the Counter-Flashing Bottom Edge: Traps water between counter-flashing and step flashing. The open overlap is a drainage path—sealing it guarantees failure.
– Omitting Kick-Out Flashing: Causes water to run down the wall surface below the roof line, leading to staining and moisture intrusion at the wall base.
Verification & Inspection Tips:
– During Installation: After every 3-4 flashing pieces, verify overlaps are consistent (min. 2″), vertical legs are tucked behind WRB, and no nails penetrate vertical legs.
– Post-Installation (Exterior): Spray the junction with a garden hose for 10-15 minutes while varying the angle (simulating wind-driven rain). Check interior wall and attic for leaks.
– Annual Inspection: Look for rust stains on flashing, separation at overlaps, damaged shingles at the edge, or staining on the wall below the roof line.
– Attic Check: On a sunny day, look for pinpricks of light at the roof-wall junction—indicates gaps. After rain, check for dampness on the top plate or insulation.
Window and Door Installations: The Non-Negotiable Sill Pan System
Windows and doors are intentional breaches in the building envelope. A robust, integrated flashing strategy is the difference between decades of dry performance and chronic leaks. The sill pan is the single most critical component—omitting it is a frequent error in moisture intrusion cases.
Objective within Framework:
– Layer 1: Window frame, cladding, and exterior sealant shed bulk water.
– Layer 2: Sill pan (integrated with WRB) catches intruding water; jamb and head flashing direct it to the pan; all components lap shingle-style with WRB.
– Layer 3: Drainage gap behind cladding allows water exiting the rough opening to drain; weep holes in window frame (if present) must remain clear.
Tools & Materials:
– Pre-formed sill pan (metal or rigid plastic) OR peel-and-stick membrane for site-built pan
– Flashing tape (WRB-compatible, vapor-permeable)
– Backer rod (closed-cell foam)
– High-quality polyurethane sealant (paintable)
– Utility knife, trowel, caulk gun
– Level, shims, tape measure
– Safety glasses, gloves
Pre-Installation Checklist:
– [ ] Rough opening dimensions: Typically 1/2″ wider and 1/2″ taller than window unit to allow for shimming and drainage. Verify plumb, level, and square.
– [ ] WRB is installed on wall sheathing. Cut “I” or “flap” openings at rough opening per WRB manufacturer instructions.
– [ ] Sill is sloped outward: Minimum 1/4″ per foot slope toward exterior OR has a continuous “back dam” (raised lip at interior edge of sill pan) to prevent inward water flow.
– [ ] Remove any protective film from window frame before installation.
Step-by-Step Procedure (New Construction / Full Replacement):
1. Install Sill Flashing (The Foundation):
– Site-Built Pan (Recommended for Control): Apply a continuous strip of peel-and-stick membrane across the entire rough opening sill. Extend the membrane up the jambs (sides) by at least 6 inches. Fold the membrane carefully to form a seamless “pan” shape. Ensure the membrane slopes slightly outward (use a small shim under the exterior edge if needed). Create a “back dam” by folding up a 1/2″ lip at the interior edge of the sill.
– Pre-Formed Pan: Set the rigid plastic or metal pan into the rough opening. Seal the seam between pan and sheathing with compatible tape or sealant. Ensure slope and back dam are present.
– CRITICAL: The sill flashing must extend under where the window sill will sit and lap under the jamb flashing to be installed next.
2. Install Jamb Flashing:
– Apply flashing tape up each side of the rough opening, starting from the bottom. Overlap the bottom edge of the tape onto the sill pan membrane by at least 2 inches.
– Extend the tape up the jambs 6-12 inches above the window head location.
– Pro Tip: Leave the release paper on the central portion of the tape where the window frame will contact. This prevents the window from bonding directly to the tape, allowing for thermal expansion/contraction without stressing the seal. Remove release paper only from the outer edges to be sealed to the WRB flaps.
3. Install the Window Unit:
– Carefully set the window into the rough opening.
– Shim beneath the sill and at the jambs to achieve perfect level, plumb, and square. Do not overtighten fasteners—follow manufacturer’s torque specs to avoid frame distortion.
– Critical Check: Ensure the window’s built-in nailing flange (if present) is positioned over the WRB flaps and under the head flashing to come.
4. Install Head Flashing:
– Place a continuous piece of flashing tape or metal flashing over the top of the window frame.
– SHINGLE LAP SEQUENCE: The head flashing must lap over the top edges of the jamb flashing tapes AND lap under the WRB flap above the window. This creates the essential downward flow path.
– Seal the top edge of the head flashing to the WRB above with compatible tape.
5. Seal the Perimeter:
– Insert backer rod into the gap between the window frame and rough opening on all sides except the bottom sill.
– Apply a continuous, tooled bead of polyurethane sealant on the exterior face of the gap (top and sides). Tooling (smoothing with a wet finger or tool) ensures adhesion to both surfaces.
– ABSOLUTELY CRITICAL: DO NOT SEAL THE BOTTOM GAP between the window sill and the rough opening sill. This gap is the drainage path for any water that enters the rough opening. Sealing it traps water inside the wall cavity.
– Interior: Apply sealant or low-expansion foam on the interior gap per manufacturer instructions, ensuring vapor permeability aligns with climate zone requirements.
Retrofit Scenario (Insert Window Replacement):
When replacing only the sash within an existing frame:
– Remove old sash and clean the opening thoroughly.
– Inspect existing sill pan/flashing. If damaged or missing, address it (may require partial frame removal).
– Apply high-quality, flexible flashing tape around the interior perimeter of the existing frame where the new window will seat.
– Install the new window unit per manufacturer instructions.
– Seal the exterior gap between the new window frame and the old opening with backer rod and sealant (top and sides only; ensure bottom drainage path remains open if the system allows).
– Limitation: Retrofit flashing cannot replicate the integrated sill pan of a full replacement. Manage expectations—this is mitigation, not a perfect solution. Full replacement is recommended for leak-prone windows.
Common Mistakes to Avoid:
– Skipping the Sill Pan: Without a pan, water entering at the sill flows directly into the wall cavity. No amount of sealant compensates for this.
– Sealing the Sill Gap: Caulking the bottom gap traps water. Drainage must be allowed.
– Incorrect Overlap Sequence: Head flashing must lap over jamb flashing; jamb flashing must lap over sill pan. Reversing this creates a funnel.
– Using Silicone Sealant: Silicone does not adhere well to many WRB membranes or window materials and is difficult to paint. Use polyurethane or hybrid polymer sealants specified for window installation.
– Overtightening Fasteners: Distorts the window frame, creating gaps and operational issues. Shim properly; let shims carry the load.
Verification & Inspection Tips:
– Water Test: After installation and sealant cure (24-48 hrs), perform a rigorous water test. Spray the window head and jambs continuously for 15 minutes while varying the angle. Have an observer inside check for leaks at the sill, jambs, and head. Pay special attention to the bottom corners.
– Check Weep Holes: If the window frame has weep holes, ensure they are clear of debris, sealant, or paint. Blocked weep holes render the drainage system useless.
– Annual Inspection: Check exterior sealant for cracks, separation, or UV degradation. Look for staining on interior window stool or surrounding wall. Operate the window—stiffness can indicate frame distortion.
Chimney Flashing: Crickets, Step Flashing, and Counter-Flashing Mastery
Chimneys present multiple challenges: large surface area disrupting roof flow, dissimilar materials, and heat exposure. Failures here can cause significant structural damage. IRC Section R903.2 provides guidance for chimneys wider than 30 inches.
Objective within Framework:
– Layer 1: Roofing material sheds water; cricket (on wide chimneys) diverts flow.
– Layer 2: Step flashing on sides integrated with roof underlayment; counter-flashing embedded in masonry reglet protects top edge.
– Layer 3: Roof slope provides drainage; open counter-flashing overlap allows escape.
Tools & Materials:
– Cricket assembly (pre-formed metal or site-built framing + flashing)
– Step flashing pieces (copper or stainless steel highly recommended)
– Counter-flashing (matching step flashing material or PVC for masonry)
– Reglet cutting tool (masonry chisel, angle grinder with masonry blade)
– Non-hardening sealant (polyurethane or butyl)
– Mortar mix (for reglet repair, if needed)
– Heat-resistant sealant (for areas near flue pipe)
– Safety gear: Respirator (for masonry dust), eye protection, gloves
Step-by-Step Procedure:
1. Install Cricket (If Chimney Width > 30 inches):
– Per IRC R903.2 guidance, chimneys wider than 30 inches benefit from a cricket (saddle) on the high side to divert water around the chimney.
– Frame the cricket with the same slope as the main roof.
– Flash the cricket like a small roof valley: Install underlayment, then metal valley flashing (W-shaped), ensuring it integrates with the main roof underlayment and step flashing sequence.
– Critical: The cricket flashing must lap under the step flashing on the high side of the chimney.
2. Prepare Chimney Surface:
– Clean mortar joints where step flashing will be inserted. Remove loose mortar.
– For framed chimneys (chase), ensure WRB is intact and accessible for flashing integration.
3. Install Step Flashing on Sides:
– Begin at the bottom of the chimney on both sides.
– Insert the vertical leg of the first step flashing piece into a mortar joint (for masonry) or behind the WRB (for framed chase).
– Place the horizontal leg on the roof deck. Nail only through the horizontal leg into the roof deck.
– Install the first shingle course over the horizontal leg.
– Repeat the “flash-shingle” sequence up both sides of the chimney, overlapping each piece by 2+ inches. Ensure vertical legs are securely seated in mortar joints or behind WRB.
4. Install Counter-Flashing:
– Cut a reglet (groove) into the chimney mortar joint approximately 1 inch deep and 1/2 inch wide, starting 1-2 inches above the top of the installed step flashing. Use an angle grinder with a masonry blade for precision; wear a respirator.
– Clean the reglet thoroughly of dust and debris.
– Insert the top edge of the continuous counter-flashing strip into the reglet.
– Seal the reglet with a non-hardening, flexible sealant (e.g., polyurethane rope caulk or butyl sealant). Do not pack with rigid mortar—thermal expansion and building movement will crack it.
– Bend the counter-flashing outward so its bottom edge overlaps the top piece of step flashing by 1-2 inches. Form a slight “kick-out” bend at the bottom edge to direct water away.
– CRITICAL: DO NOT SEAL THE BOTTOM EDGE of the counter-flashing where it overlaps the step flashing. This gap is the drainage path for any water that gets behind the counter-flashing. Sealing it traps moisture against the chimney.
5. Cap Flashing (Chimney Crown):
– Install a saddle-shaped metal cap flashing over the top of the chimney where it meets the roof.
– Seal the edges where the cap meets the chimney crown with high-temperature, UV-resistant sealant.
– Ensure the cap flashing directs water to both sides of the chimney, flowing over the step flashing.
Common Mistakes to Avoid:
– Omitting the Cricket on Wide Chimneys: Water pools on the low side of the chimney, overwhelming the step flashing. IRC guidance addresses this for chimneys >30″ wide.
– Using Roof Cement as Primary Flashing: “Roof tar” is a temporary patch, not a flashing solution. It dries out, cracks, and fails within a few years. It also traps moisture. Never use it as a substitute for integrated metal flashing.
– Sealing the Counter-Flashing Reglet with Mortar: Rigid mortar cracks with movement. Flexible, non-hardening sealant is mandatory.
– Sealing the Counter-Flashing Bottom Edge: This is a frequent counter-flashing error. The open overlap is intentional drainage—sealing it guarantees water intrusion behind the flashing.
– Ignoring Heat Near Flue: Standard sealants melt near the flue pipe. Use high-temperature silicone (rated >500°F) or metal collars specifically designed for flue penetrations.
Verification & Inspection Tips:
– Visual Inspection: Look for rust stains on flashing, cracked or missing mortar in the reglet, separation between counter-flashing and chimney, or vegetation growing in gaps.
– Attic Inspection: After rain, check the attic space around the chimney chase for water stains, damp insulation, or mold growth on framing. Shine a flashlight along the chimney base.
– Professional Assessment: For complex chimneys or suspected damage, consult a certified chimney sweep or building professional with moisture detection tools.
Wall Penetrations: Vents, Pipes, and Conduits—The “Small Hole, Big Problem” Principle
Every penetration—dryer vent, plumbing stack, gas line, electrical conduit—is a potential leak source. The strategy is consistent: integrate flashing with the WRB, slope surfaces outward, and never seal the bottom.
General Procedure for Round Penetrations (Pipes, Vents):
1. Pre-Installation (Ideal): Cut the hole in the sheathing. Install the penetration pipe after the WRB and flashing are in place.
2. WRB Integration:
– Cut an “X” or “I” slit in the WRB at the penetration point.
– Fold back the WRB flaps.
– Apply peel-and-stick membrane flashing around the penetration: Start below the penetration, wrap up and over the top, ensuring the membrane laps over the WRB above the penetration and under the WRB below it (shingle-style).
– Seal seams with compatible tape.
3. Install Penetration: Slide the pipe/vent through the hole.
4. Final Flashing:
– For pipes: Use a pre-formed rubber boot flashing. Slide the wide flange under the WRB above the penetration and over the WRB below. Seal the top and sides of the flange to the WRB with compatible tape or sealant. Leave the bottom unsealed.
– For vents (dryer, bath fan): Install the vent body. Flash the body to the WRB using membrane tape. Ensure the vent sleeve slopes slightly downward to the exterior (1/4″ per foot). Install the exterior vent cap with an integrated backdraft damper and drip edge. Seal the cap trim to the cladding with paintable sealant on top/sides only; do not seal the bottom.
5. Cladding Installation: Install siding or other cladding, ensuring it has a drip edge above the penetration and does not block drainage paths.
Critical Nuances by Type:
– Plumbing Vents: Use boots rated for the pipe material (PVC, ABS). In cold climates, ensure the boot is rated for low temperatures to prevent cracking.
– Dryer Vents: Lint buildup is a fire hazard and blocks drainage. Clean vents regularly. Use rigid metal ducting (not flexible foil) per IRC guidance. Use a vent cap with a tight-sealing damper to prevent pest entry and backdrafting.
– Gas Lines: Consult local code—some jurisdictions require specific flashing details or conduit protection. Ensure no sealant contacts the gas line itself.
– Electrical Conduits: Use weatherproof conduit bodies and gaskets. Flash the conduit penetration like any other pipe. Ensure the electrical box has a proper gasket and cover plate.
Common Mistake: Sealing completely around the penetration with caulk or foam. This traps any moisture that gets behind the cladding. Water must be able to drain out the bottom. The flashing system guides it out; sealing the bottom defeats the entire purpose.
Valley Flashing: Managing the River on Your Roof
Valleys concentrate massive water flow. Two primary methods exist; choice depends on roof design, climate, and aesthetics.
Open Valley Method (Recommended for Durability):
– Install a continuous W-shaped metal valley flashing (copper, stainless steel, or coated steel) over the roof underlayment. Extend 12-18 inches up each roof plane.
– Shingle each roof plane up to, but not into, the valley. Cut shingles to leave a 2-inch gap on each side of the valley centerline, exposing the metal.
– Advantages: Water flows freely without obstruction; debris washes through; easy to inspect and maintain; longest service life.
– Material Tip: Use corrosion-resistant metal due to constant water exposure. Copper develops a protective patina; stainless steel is ideal for coastal areas.
– Installation Tip: Nail the valley flashing only near the edges, avoiding the center channel. Use roofing cement sparingly under the edges only if required by manufacturer (not as a primary attachment).
Closed Valley Method:
– Install ice and water shield underlayment extending at least 3 feet up each roof plane from the valley centerline (IRC requirement in many zones; check local code). Seal all seams.
– Shingle both roof planes so the tabs overlap in the valley. Typically, the shingles from the smaller roof plane lap over those from the larger plane.
– Disadvantages: Debris accumulates in the shingle overlap; shingle edges can lift, allowing water intrusion; harder to inspect; higher failure rate than open valleys.
– When Acceptable: Primarily for aesthetic reasons on architectural shingle roofs where the closed look is desired. Avoid on roofs with heavy debris (pine needles, leaves) or in regions with heavy snow/ice.
– Critical Enhancement: Even in closed valleys, install a metal valley pan under the ice and water shield for added security. The shield alone is insufficient long-term.
Common Mistake: Installing shingles in a closed valley without adequate ice and water shield underlayment extending far up the roof planes. The underlayment is the true Layer 2 defense; shingles alone cannot handle valley water volume.
Advanced Techniques and Climate-Specific Adaptations
Weatherproofing is not one-size-fits-all. Climate zone, local building codes, and architectural style demand tailored approaches. This section provides actionable adaptations grounded in regional building science.
Cold Climates (Zones 5-8): Defeating Ice Dams and Condensation
Primary Threats: Ice dams (water backing up under shingles), interior moisture condensing within wall cavities, freeze-thaw cycles damaging masonry.
Strategic Adaptations:
– Roof Eaves: Install ice and water shield underlayment from the eave up to at least 24 inches past the interior face of the exterior wall (IRC R905.2.7). In heavy snow zones, extend 3-6 feet. Seal all seams with manufacturer-recommended tape. This creates a continuous waterproof membrane under the shingles.
– Ventilation is Essential: Proper attic ventilation (soffit intake + ridge exhaust) keeps the roof deck cold, preventing snow melt that causes ice dams. Install rafter vents (baffles) to maintain airflow from soffit to ridge, preventing insulation from blocking intake. Target ventilation ratios per IRC R806 guidelines.
– Wall Assemblies: Prioritize outward drying potential. Use vapor-permeable WRBs (e.g., >10 perms). Avoid interior polyethylene vapor barriers unless required by specific climate calculations. Ensure the drainage plane behind cladding is unobstructed—furring strips are highly recommended.
– Emergency Ice Dam Response: Do not chop ice with axes (damages shingles). Safely remove snow from the lower 3-4 feet of the roof using a roof rake from the ground. To create drainage channels through existing ice, fill a nylon stocking with calcium chloride ice melt (NOT rock salt—it damages shingles and vegetation) and lay it vertically across the ice dam. This is a temporary fix; address the root cause (insulation/ventilation) promptly.
– Window Flashing: Pay extra attention to sill pans. Cold surfaces increase condensation risk; ensure the rough opening is sealed airtight (with compatible tapes) to prevent warm, moist interior air from contacting cold sheathing.
Hot-Humid Climates (Zones 1-3): Managing Rain, Humidity, and Salt Air
Primary Threats: Wind-driven rain, high humidity driving moisture inward, salt corrosion (coastal), mold growth in wall cavities.
Strategic Adaptations:
– Drainage Plane is Paramount: Install a robust drainage gap (minimum 3/8″) behind all cladding using furring strips, drainage mats, or rainscreen systems. This is critical for allowing trapped moisture to drain and promoting drying. Brick veneer must have weep holes and ventilation openings per IRC R703.7.
– Material Selection:
– Coastal Zones (within 1 mile of ocean): Use 316 stainless steel flashing exclusively. Aluminum and galvanized steel corrode rapidly. Verify compliance with local amendments.
– All Hot-Humid Zones: Choose WRBs and flashing tapes with high vapor permeability (>20 perms) to allow walls to dry inward and outward. Avoid impermeable barriers unless part of a specifically engineered assembly.
– Roof Overhangs: Maximize overhangs (2+ feet) where architectural style allows. This significantly reduces wind-driven rain exposure on walls.
– Window/Door Flashing: Emphasize perfect integration. Use fluid-applied flashing or high-adhesion tapes rated for high humidity. Ensure sill pans have a pronounced slope and back dam. Seal the interior rough opening perimeter with air-sealing tape to prevent humid outdoor air from infiltrating wall cavities.
– Ventilation: Promote cross-ventilation in wall cavities. Use vented soffits and ridge vents on roofs. Consider powered attic ventilators only if passive ventilation is insufficient and properly sized (consult HVAC professional).
Historic Homes: Preserving Character While Upgrading Performance
Primary Challenge: Balancing preservation of original materials and aesthetics with modern moisture management needs. Often involves working with lime mortar, old-growth wood, and non-standard dimensions.
Strategic Adaptations:
– Material Matching: Where visible flashing is part of the historic fabric (e.g., copper on a Victorian), use matching materials (copper, lead-coated copper). For hidden flashing, modern materials (stainless steel, high-performance membranes) are acceptable if they don’t alter the assembly’s performance negatively.
– Minimally Invasive Techniques:
– Retrofit Window Flashing: Instead of full replacement, carefully remove interior trim. Inject closed-cell spray foam (low-expansion) into the rough opening gap for air sealing. From the exterior, clean the perimeter and apply a high-bond, flexible flashing tape over the existing nailing flange and cladding, lapping onto the WRB if accessible. Install new exterior trim with a drip edge. Note: This is less robust than a full sill pan install but often the only feasible option.
– Masonry Repairs: When repointing mortar around chimneys or walls, use lime-based mortar compatible with historic soft brick. Install counter-flashing with a reglet cut carefully to avoid damaging surrounding brick. Use lead or copper counter-flashing for authenticity and workability.
– Consult Experts: Engage a preservation architect or contractor experienced in historic weatherproofing. Local historic preservation commissions often have specific guidelines.
– Prioritize Drainage: Often, the biggest improvement is adding or restoring functional gutters and downspouts to move water away from the foundation, reducing splash-back on walls. Ensure downspouts discharge at least 5 feet from the foundation.
High-Wind and Hurricane-Prone Regions (Coastal Zones, Tornado Alleys)
Primary Threats: Extreme wind pressures forcing water horizontally through cladding, debris impact damage, uplift on roof edges.
Strategic Adaptations (Beyond Standard Flashing):
– Roof Edge Flashing: Use enhanced drip edge profiles with deeper flanges (min. 1.5″) nailed at closer intervals (every 6 inches). Integrate with peel-and-stick underlayment extending 36+ inches up the roof plane at eaves and rakes.
– Impact-Resistant Materials: Specify impact-resistant shingles (Class 4 rating) and cladding where required by code.
– Window/Door Protection: Install impact-resistant windows or storm shutters. Flashing details must accommodate the additional layers without compromising the drainage plane.
– Sealant Selection: Use high-performance, high-movement sealants rated for extreme wind loads (check ASTM C920 compliance).
– Code Compliance: Strictly adhere to local high-wind provisions. These often mandate specific nailing patterns, underlayment types, and flashing details. When in doubt, consult a structural engineer.
Troubleshooting Common Weatherproofing Failures: Diagnosis and Repair
Even with meticulous installation, issues can arise due to material fatigue, extreme weather, or undetected errors. This section provides a diagnostic approach to common symptoms.
Symptom: Water Stains on Interior Wall Below a Window
- Likely Causes (Prioritized):
- Missing, damaged, or improperly installed sill pan (most common).
- Head flashing lapped under jamb flashing (reversed sequence).
- Sealant failure at head or jambs allowing water entry.
- Clogged weep holes in window frame.
- Cladding installed too close to window sill, blocking drainage gap.
- Diagnosis Protocol:
- Exterior Inspection: Check sealant for cracks/separation. Verify weep holes are clear. Look for staining on siding below window.
- Water Test: Spray head and jambs (not sill) for 5 minutes. If leak occurs, problem is head/jamb flashing or sealant. Spray sill area for 5 minutes. If leak occurs, problem is sill pan or drainage.
- Interior Inspection: Remove interior trim carefully. Inspect rough opening for moisture, rot, or missing flashing. Use a moisture meter on sheathing if available.
- Repair Strategy:
- Minor Sealant Failure: Clean area thoroughly, insert new backer rod, apply fresh polyurethane sealant.
- Sill Pan Failure or Missing Pan: Full window removal is usually required. Remove window, inspect and repair damaged sheathing, install proper site-built sill pan with back dam and slope, reinstall window with correct flashing sequence. This repair often requires professional assistance.
- Clogged Weep Holes: Clean carefully with a small wire or compressed air. Do not drill new holes.
- Prevention Insight: The water test during initial installation is the single best prevention step. Never skip it.
Symptom: Rust Stains or Corrosion on Chimney or Roof Flashing
- Likely Causes:
- Galvanic corrosion (dissimilar metals in contact).
- Material inappropriate for environment (e.g., aluminum on masonry, galvanized steel in coastal zone).
- Physical damage (hail, foot traffic) compromising protective coating.
- Trapped moisture due to sealed counter-flashing bottom edge.
- Diagnosis Protocol:
- Identify flashing material and adjacent materials (roofing, chimney type).
- Check for contact points between dissimilar metals.
- Inspect counter-flashing: Is the bottom edge sealed? Is the reglet sealant cracked?
- Note location: Coastal? High humidity? Acid rain area?
- Repair Strategy:
- Localized Corrosion: If minor, clean area, apply rust-inhibiting primer, and patch with compatible metal patch and sealant (temporary fix).
- Widespread Corrosion or Galvanic Failure: Complete flashing replacement is necessary. Remove old flashing. Install new flashing of correct material (e.g., stainless steel for coastal), ensuring isolation from dissimilar metals using butyl tape barriers. Repair counter-flashing reglet with flexible sealant; ensure bottom edge is unsealed.
- Trapped Moisture: If counter-flashing bottom was sealed, carefully unseal it. Clean out debris. Ensure step flashing below is intact.
- Prevention Insight: Material selection upfront prevents most corrosion issues. Consult compatibility resources and local climate factors before purchasing.
Symptom: Moisture or Mold in Attic Near Roof-Wall Junction or Chimney Chase
- Likely Causes:
- Step flashing not integrated behind wall WRB (water running down wall enters attic).
- Nails penetrating vertical leg of step flashing.
- Missing or damaged cricket on wide chimney.
- Inadequate ventilation causing condensation (check for uniform frost/moisture vs. localized leak).
- Diagnosis Protocol:
- During Rain: Have an observer in the attic with a flashlight. Identify exact leak origin.
- Dry Inspection: Look for water stains on roof sheathing, top plate, or insulation. Check for light gaps at junctions. Inspect chimney chase flashing.
- Ventilation Check: Verify soffit vents are unobstructed (no insulation blocking), ridge vent is clear. Use a smoke pencil to test airflow if possible.
- Repair Strategy:
- Flashing Error: Requires roof work. Remove shingles at junction. Verify step flashing vertical legs are tucked behind WRB. Replace damaged flashing pieces. Ensure nails are only in horizontal legs. Reinstall shingles.
- Chimney Issue: Install cricket if missing/wide chimney. Repair step and counter-flashing per chimney section.
- Ventilation Issue: Install rafter vents/baffles at soffits. Add additional ridge or gable vents if needed. Seal attic bypasses (recessed lights, plumbing vents) to reduce warm, moist air entering attic.
- Prevention Insight: Annual attic inspections (spring and fall) catch issues early. Look for new stains, mold, or wet insulation.
Symptom: Efflorescence (White Powder) or Spalling on Masonry Below Roof Line
- Likely Cause: Water is being directed onto the masonry surface due to missing or improperly installed kick-out flashing at roof-wall terminations. Water carries dissolved salts from mortar; as it evaporates, salts deposit on the surface (efflorescence). Repeated wetting/drying cycles cause surface deterioration (spalling).
- Diagnosis: Trace the roof line down to the wall. Is there a kick-out flashing at the termination point? Is water visibly running down the wall surface after rain?
- Repair Strategy:
- Clean efflorescence with stiff brush and water (avoid acid cleaners unless specified for the masonry).
- Install a kick-out flashing at the roof-wall termination point. This small angled piece directs water away from the wall and into the gutter.
- Ensure gutters are clean and downspouts discharge away from the foundation.
- Prevention Insight: Kick-out flashing is a small component with massive impact. Include it in every roof-wall termination detail. It costs little but prevents significant damage.
Your Questions, Answered: Real-World Concerns Addressed
Q: Can I use roofing cement or tar to temporarily fix a leaking flashing?
A: Roofing cement (asphalt plastic cement) can provide a very short-term patch (days to a few weeks) for small gaps or separated seams. Clean and dry the area thoroughly. Apply a thin, smooth layer—thick globs crack and peel. Critical limitations: It degrades rapidly under UV exposure; becomes brittle in cold weather; traps moisture if applied over existing leaks; and is nearly impossible to remove cleanly for proper repair. Never use it as a permanent solution or to “seal” counter-flashing edges. It is a stopgap only. Schedule a proper repair using correct flashing materials and integration techniques immediately. For temporary emergency leaks during a storm, a tarp secured over the affected area (not under) is safer and more effective.
Q: How do I know if my existing flashing needs replacement?
A: Conduct a bi-annual inspection (spring and fall). Look for these indicators:
– Visual Signs: Rust, corrosion, cracks, holes, or separation from the surface on metal flashing; bubbling, peeling, or UV degradation on membranes; missing pieces.
– Staining: Water stains on interior walls, ceilings, or insulation below flashing locations; efflorescence (white powder) on masonry; dark streaks on siding below roof lines.
– Mold/Mildew: Growth on interior surfaces near windows, doors, or chimneys.
– Age: Metal flashing in harsh environments (coastal, industrial) may need inspection after 15 years; in mild climates, 25+ years is possible. Peel-and-stick membranes typically last 20-30 years if not exposed to UV.
– After Events: Inspect thoroughly after severe storms, hail, or high winds. If flashing is over 20 years old and shows any signs of wear, proactive replacement is far more economical than repairing resulting water damage.
Q: Is peel-and-stick membrane “better” than traditional metal flashing?
A: Neither is universally superior—they serve complementary roles within the Three-Layer Framework. Peel-and-stick excels as a secondary barrier (Layer 2): sealing seams in WRBs, creating sill pans, providing adhesion on vertical surfaces, and acting as ice/water shield underlayment. Its strength is conformability and seamless coverage on complex shapes. Metal flashing excels as a primary deflector and drainage component (Layer 1/2 interface): step flashing, drip edges, valley flashing, and counter-flashing where rigidity, longevity, and positive drainage are critical. Metal provides a durable surface that sheds water efficiently and withstands physical abuse. Best Practice: Use them together. Example: Install peel-and-stick membrane as the sill pan and to seal WRB seams around a window, then use metal head flashing for durability and to create a drip edge. Choose the right tool for the specific function within the system.
Q: What’s the single most common flashing mistake DIYers (and even some contractors) make?
A: Failing to integrate flashing with the Water-Resistive Barrier (WRB) using the shingle-lap principle. This manifests in two critical errors:
1. Installing flashing on top of the WRB instead of behind it (e.g., step flashing vertical leg over WRB). This directs water behind the flashing into the wall.
2. Sealing the bottom edge of flashing assemblies (e.g., counter-flashing, window head flashing), trapping water inside the assembly with no drainage path.
Both errors violate the core principle of directional water flow. Remember: Upper layers must lap over lower layers. Water flows down; the system must guide it out. Always verify the lap sequence against diagrams before proceeding. When in doubt, perform a water test on a small section.
Q: Do I need a building permit to replace flashing?
A: Typically, minor flashing repairs do not require a permit (e.g., replacing a few pieces of step flashing, resealing a window). However, permits are usually required if the work involves:
– Replacing large sections of roof decking or wall sheathing due to rot.
– Structural modifications (e.g., altering a chimney chase).
– Work that is part of a larger renovation project requiring a permit.
– Specific jurisdictions with strict historic preservation or coastal regulations.
Always check with your local building department. Permits ensure work complies with current codes, which is critical for safety, performance, and future home resale. An inspector can verify critical details like WRB integration and cricket installation. The small fee and time investment provide significant peace of mind and legal protection.
Q: Can I install new flashing over old flashing?
A: Generally, no. Old flashing may be corroded, fatigued, improperly installed, or incompatible with new materials. Installing new flashing over old creates multiple failure risks:
– Traps moisture between layers.
– Prevents proper integration with the WRB (you can’t tuck new flashing behind WRB if old flashing is in the way).
– Adds unnecessary thickness, distorting cladding or shingles.
– Masks underlying damage (rot, mold) that needs repair.
Rare Exceptions: Some specialized retrofit products exist (e.g., certain window flashing tapes designed to adhere over existing flanges), but these are specific solutions, not general practice. Best Practice: Remove old flashing completely. This allows:
1. Inspection and repair of substrate damage (rotten sheathing, mold).
2. Verification and repair of the WRB.
3. Correct integration of new flashing with the WRB system.
The extra time spent on removal and substrate prep is the foundation of a lasting repair.
Q: How does flashing differ for a metal roof versus asphalt shingles?
A: Metal roofs demand greater attention to material compatibility, thermal movement, and manufacturer-specific details:
– Material Compatibility: Avoid galvanic corrosion. Use stainless steel or aluminum flashing with aluminum roofs; copper flashing with copper roofs. Never use copper flashing on aluminum roofs. Consult the roof manufacturer’s guidelines.
– Thermal Movement: Metal expands and contracts significantly with temperature swings. Flashing must accommodate this:
– Use slip joints or cleats instead of rigid fastening at long runs.
– Avoid over-tightening fasteners; use slotted holes where specified.
– Flashing details must allow panels to move without distorting the flashing.
– Manufacturer Kits: Always use the flashing components and profiles specified by the metal roof manufacturer (ridge caps, valley pans, wall flashing). Generic flashing often won’t integrate correctly.
– Underlayment: Synthetic underlayment is preferred over felt for its durability during installation. Ice and water shield is still required at eaves/valleys per code.
– Penetrations: Use manufacturer-supplied pipe boots or flashing kits designed for the specific panel profile. Sealant choice is critical—use sealants approved for metal roofs.
Key Takeaway: Metal roof flashing is highly system-specific. Deviating from the manufacturer’s instructions voids warranties and risks failure. When in doubt, consult the manufacturer or a certified metal roof installer.
Q: What exactly is a “reglet,” and why is it essential for masonry counter-flashing?
A: A reglet is a continuous groove (typically 1/2″ to 3/4″ deep) cut horizontally into a masonry surface (brick, stone, concrete block) to receive the top edge of counter-flashing. Its purposes are critical:
1. Secure Anchoring: It mechanically locks the counter-flashing in place, resisting wind uplift and physical displacement.
2. Concealed Sealant Joint: The reglet allows the top edge of the flashing to be sealed with a flexible, non-hardening sealant (polyurethane, butyl) that is protected from direct UV exposure, weathering, and physical damage. This dramatically extends sealant life.
3. Accommodates Movement: The flexible sealant within the reglet allows for slight building movement and thermal expansion/contraction of the flashing without cracking.
Why Surface-Mounted Counter-Flashing Fails: Flashing simply bent over the masonry surface and sealed with caulk is highly vulnerable. UV degrades the sealant rapidly; wind lifts the edge; thermal cycling breaks the bond. Water easily gets behind it. Cutting a proper reglet is labor-intensive but non-negotiable for durable, code-compliant flashing on masonry. Use an angle grinder with a diamond blade and wear appropriate respiratory protection.
Q: Are there truly eco-friendly or sustainable flashing materials?
A: Sustainability can be evaluated across material sourcing, longevity, recyclability, and embodied energy:
– Recycled Content Metals: Copper and aluminum flashing often contain significant post-consumer recycled content (check manufacturer specs). Their extreme longevity (50-100+ years) means fewer replacements and less waste over the building’s life. Both are 100% recyclable at end-of-life.
– Durability as Sustainability: Choosing a premium, long-lasting material (e.g., stainless steel in coastal zones) that won’t need replacement in 15 years is more sustainable than a cheaper material requiring frequent replacement. Lifecycle assessment favors durability.
– Bio-Based Membranes: Emerging products use recycled rubber (from tires) or bio-based oils in modified bitumen membranes. Research specific products for certifications (e.g., Declare label, Cradle to Cradle).
– Reclaimed Materials: In historic restoration, carefully sourced reclaimed lead or copper flashing can be appropriate (handle lead with extreme caution and follow EPA guidelines).
– Avoid: Materials with high embodied energy and short lifespans that end up in landfills (e.g., single-use asphalt cement patches).
Balanced View: The most sustainable flashing is the one installed correctly the first time, integrated properly, and lasting the life of the assembly. Prioritize correct installation and longevity over marginal “green” claims on inferior products.
Q: How do I flash a skylight correctly? It seems complicated.
A: Skylights are high-risk penetrations. Never improvise. Follow this protocol:
1. Use the Manufacturer’s Kit: Every reputable skylight comes with a flashing kit specific to that model and roof type (shingle, tile, metal). Using generic flashing voids warranties and guarantees failure.
2. Pre-Installation: Read the entire installation manual before purchasing or cutting the roof. Verify compatibility with your roof pitch and material.
3. General Sequence (Shingle Roof Example):
– Install ice and water shield underlayment extending 12+ inches beyond the rough opening on all sides.
– Install the skylight curb (frame) on the roof deck.
– Install the base flashing pieces integrated with the underlayment (laps under shingles below).
– Install step flashing pieces on the sides, integrated shingle-style with the roof underlayment and wall WRB if applicable.
– Install the head flashing, lapping over the step flashing and under the shingles above.
– Set the skylight lens unit onto the curb.
– Seal all joints per manufacturer instructions with specified sealant.
4. Critical Checks:
– All flashing components must lap shingle-style.
– No nails should penetrate the flashing in a way that creates upward-facing holes.
– The assembly must allow drainage at all points (no sealed joints trapping water).
– After installation, perform a thorough water test before completing interior finishes.
Due to the complexity and high risk of failure, many homeowners choose to hire a professional installer certified by the skylight manufacturer.
Conclusion: Your Path to a Dry, Resilient Home
Weatherproofing is not a one-time project but an ongoing practice of vigilance and informed maintenance. By internalizing the Three-Layer Defense Framework—understanding that resilience comes from redundancy, directional flow, and integration—you transform from a passive homeowner into an active steward of your home’s envelope. Building science research consistently shows that moisture management is foundational to structural longevity, energy efficiency, and indoor environmental quality.
Recap of Core Principles:
1. Integration is Everything: Flashing never works in isolation. Its effectiveness depends entirely on correct integration with the Water-Resistive Barrier and cladding system, following the shingle-lap principle (upper layers lap over lower layers).
2. Drainage Trumps Sealing: Never seal the bottom edge of any flashing assembly. Water will enter; the system must provide a clear, unobstructed path for it to exit. Trapping moisture causes more damage than allowing controlled drainage.
3. Context is King: Material choices, installation sequences, and component necessity (like crickets or kick-out flashing) depend entirely on your specific climate, architecture, adjacent materials, and local building code requirements. There is no universal “one-size-fits-all” solution.
The 24-Hour Rule: Within the next 24 hours, take one small, concrete step toward protecting your home. Choose a single vulnerable point—such as the base of a window, a visible roof-wall junction, or your chimney—and conduct a two-minute visual inspection. Look for cracks in sealant, rust on metal flashing, staining on adjacent surfaces, or debris accumulation. If you spot a potential issue, take a clear photo with your phone. This simple act creates awareness, establishes a baseline for future monitoring, and empowers proactive care. Knowledge begins with observation.
The Big Picture: Effective weatherproofing is a microcosm of intelligent home maintenance: proactive, systematic, and rooted in understanding how systems interact. Each correctly installed piece of flashing contributes to a larger ecosystem of durability, energy performance, and indoor air quality. By mastering these details, you safeguard not only your home’s structure