Stop guessing at the lumberyard. This definitive guide breaks down every major grading system, explains the practical meaning behind stamps and labels, and provides a clear, actionable framework to select lumber aligned with your project’s structural needs, visual goals, and budget constraints.
You stand in the lumber aisle, scanning row after row of boards stamped with cryptic codes: #2&Btr, Select Structural, FAS, #1 Common. Your project notes mention “premium lumber,” but what does that actually mean for your bookshelf, deck, or cabinet? Will this board remain stable after installation? Is that knot acceptable where strength matters? Why does one board cost significantly more than another that looks similar? This uncertainty is common—and understandable. Lumber grading systems, developed over decades by industry bodies like the American Lumber Standard Committee (ALSC) and National Hardwood Lumber Association (NHLA), serve as standardized communication tools across the supply chain. Yet without context, they feel like a closed language. Choosing mismatched grades can lead to aesthetic disappointment, unnecessary expense, or—in structural applications—compromise safety. This guide transforms confusion into clarity. We’ll systematically explain the logic behind North American grading frameworks, clarify where systems diverge, provide project-specific selection pathways, and share practical inspection techniques. By the end, you’ll approach lumber selection with informed confidence, making intentional choices that honor your project’s purpose, your budget, and material sustainability.
Introduction: Why Understanding Grades Empowers Every Builder
Lumber grading functions as a vital communication system—not merely a pricing label. Each stamp or designation conveys verified information about a board’s structural capacity, visual characteristics, or yield potential. Ignoring these signals is like proceeding without verifying material specifications: outcomes become unpredictable. In structural contexts, misapplied grades have contributed to documented failures in decks, porches, and sheds. In woodworking, mismatched appearance grades can undermine aesthetics or inflate costs unnecessarily. Conversely, strategic grade selection allows thoughtful allocation of resources—reserving higher grades for visible or critical elements while confidently using economical options where defects are irrelevant (such as painted interiors or hidden framing). This knowledge also supports sustainable practices: selecting lower appearance grades (#2 Common, Utility) for appropriate applications reduces waste by utilizing boards downgraded only for cosmetic reasons. This guide focuses exclusively on grading systems encountered across North American retail and specialty suppliers: structural softwood grading (ALSC and regional agencies), softwood appearance standards (primarily WWPA), and hardwood grading (NHLA framework). Where Canadian (CSA) or regional variations are relevant to safety or selection, they are noted. All guidance reflects established industry standards and observable patterns in lumber retail practices. This is practical knowledge designed for immediate application—whether you’re framing a shed, building a table, or selecting trim.
The Two Fundamental Worlds of Lumber Grading
Before interpreting any stamp, recognize the most critical distinction: no single grading system applies universally. What you see depends entirely on two factors: wood type (softwood vs. hardwood) and intended function (structural vs. appearance). Conflating these systems is the root of most selection errors. Let’s clarify the landscape.
Why “Softwood” and “Hardwood” Are Botanical, Not Quality, Terms
Botanically, softwoods originate from coniferous trees (pine, fir, spruce, cedar, redwood); hardwoods come from deciduous species (oak, maple, cherry, walnut, ash). Crucially, “softwood” does not mean “physically soft.” Southern Yellow Pine (a softwood) is denser and harder than aspen (a hardwood). Grading systems diverged because these materials historically serve different roles: softwoods dominate structural framing and utility applications due to availability, straight grain, and strength-to-weight properties; hardwoods excel in furniture, cabinetry, and visible millwork where aesthetics, fine finishing, and wear resistance matter. This functional separation shaped two distinct grading philosophies—one prioritizing performance, the other visual yield.
Structural Grading vs. Appearance Grading: Purpose Defines the System
Structural grading evaluates physical performance characteristics: strength, stiffness, density, and resistance to failure under load. Visual features like knots, wane (missing wood at the edge), or grain slope are assessed solely for their impact on structural integrity. A knot permissible in a non-critical zone of a joist may disqualify the board from a higher structural grade. Structural grades are legally required for load-bearing applications governed by building codes (decks, roofs, walls, floors). Stamps are applied by certified agencies (WWPA, SPIB, NELMA) and include species group, grade, moisture content, mill ID, and agency mark. Using non-structurally graded material in load-bearing roles violates code requirements and introduces safety risks.
Appearance grading evaluates visual qualities: knot size/number/type, color consistency, grain pattern, sapwood/heartwood ratio, mineral streaks, and surface defects. Strength is irrelevant here—appearance grades assume non-structural use (furniture faces, cabinet doors, trim, paneling). A board with dramatic figuring but a small sound knot might earn a high appearance grade yet fail structural grading. Appearance standards vary more than structural ones. NHLA rules govern most hardwoods; softwood appearance grades follow WWPA or regional guidelines, but commercial sorting (e.g., “Premium,” “Select”) at retail may lack formal certification. Always clarify the basis of appearance claims with your supplier.
The Fundamental Principle: Structural grades answer “Will this board safely support the required load within code parameters?” Appearance grades answer “Will this board meet the visual expectations for its final application?” Never substitute logic from one system into the other. Using a high appearance grade (like Select) for structural framing is unsafe; using a high structural grade (like Select Structural) for a visible tabletop is often inefficient and may yield poor aesthetics.
When Structural and Appearance Requirements Overlap
Some projects demand attention to both systems. An exposed porch beam must satisfy structural grade requirements and present acceptable visual qualities. Deck railings require structural integrity for safety and visual appeal. In these cases, specify both criteria clearly: “Southern Yellow Pine, #2 Structural grade or better, with minimal visible defects suitable for staining.” Many suppliers offer “architectural” or “premium appearance” structural bundles—boards pulled from structural grades but visually screened for fewer defects. Expect a price premium for this dual qualification. Proactively discussing these needs with yard staff prevents the frustration of purchasing structurally sound lumber that doesn’t meet aesthetic expectations for visible elements.
Part 1: Decoding Softwood Lumber Grades
Softwoods (pine, fir, spruce, cedar, redwood) represent the majority of lumber sold in North America. Their grading cleanly separates into structural and appearance tracks. Mastery of both is essential for framing, outdoor projects, and finish work.
The Structural Grading System: Safety Through Standardization
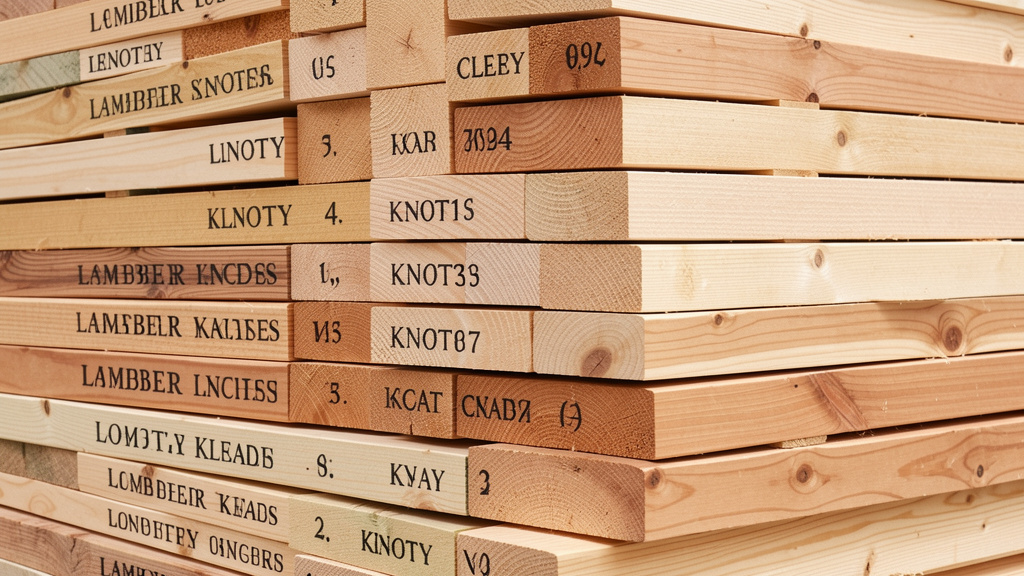
Structural softwood grading in the U.S. operates under the American Lumber Standard Committee (ALSC), with regional agencies administering rules: Western Wood Products Association (WWPA) for Western species, Southern Pine Inspection Bureau (SPIB) for Southern Yellow Pine, and Northeastern Lumber Manufacturers Association (NELMA) for Northeastern species. Every structural board carries a legally required grade stamp. Here’s how to read a typical example:
[Agency Logo: e.g., WWPA]
[Mill Number: e.g., 1234]
[Species Group: e.g., DF-L]
[Grade: e.g., SEL STR]
[Moisture Content: e.g., DRY]
- Agency Logo: Confirms grading was performed by certified inspectors under that agency’s rules. WWPA covers Douglas Fir, Hem-Fir; SPIB covers Southern Yellow Pine; NELMA covers Spruce-Pine-Fir. Rules vary slightly by region and species group.
- Mill Number: Identifies the production facility. Important for traceability if issues arise later.
- Species Group: Abbreviations denote wood type. Common codes:
DF-L: Douglas Fir-LarchHF: Hem-Fir (Hemlock, True Firs)SPF: Spruce-Pine-Fir (common in Canada/Northeast)SYP: Southern Yellow Pine (Longleaf, Loblolly, Shortleaf, Slash Pine)CWC: Coastal Western CedarRW: Redwood- Why groups? Species within a group share similar strength properties. Grading rules are calibrated to each group’s characteristics (e.g., SYP is denser than SPF).
- Grade: The performance indicator. Detailed hierarchy follows.
- Moisture Content:
DRY= 19% moisture content or less (required for most interior framing to minimize post-installation movement).MC15= 15% or less (preferred for interior finish work).GRN= Green (over 19%, used only for specific outdoor/temporary applications like landscaping ties). Never use GRN lumber for interior framing—it will shrink, twist, and potentially cause drywall cracks or joint failure.
Structural Softwood Grade Hierarchy (Highest to Lowest Performance)
Grades are assigned based on the most significant defect present. A single large knot or area of wane can lower a board’s grade.
- Select Structural (SEL STR): Premium structural grade with minimal visual defects. Knots are small, tight, and infrequent; grain is straight with controlled slope. Typical Use: Critical structural members requiring maximum strength and stiffness—beams, headers, ridge boards—especially where the member will be exposed and appearance matters (e.g., vaulted ceiling rafters). Often specified where engineering calculations demand the highest allowable stress values. Cost Consideration: Carries a noticeable premium over #1 Structural. Justified only where engineering requirements or visible placement warrant it.
- #1 Structural (#1 STR): High-strength grade with good visual quality. Allows slightly larger or more numerous knots than Select Structural, but defects remain limited and well-spaced. Typical Use: Visible structural elements where strength is critical but Select Structural’s premium isn’t required—porch beams, garage door headers, exposed rafters. Commonly specified for entire deck frames by contractors seeking reduced surface checking and better aesthetics if framing becomes visible later. Practical Insight: For most residential deck frames, #1 Structural offers an excellent balance of verified strength, visual quality, and cost efficiency.
- #2 Structural (#2 STR): The standard workhorse of residential construction. This is the minimum code-compliant grade for most floor joists, wall studs, roof rafters, and deck frames within standard span tables. Permits larger knots, more wane (within strict limits), and greater grain slope than #1. Strength properties are rigorously certified. Typical Use: The vast majority of hidden framing: interior walls, floor systems, roof structures, standard deck frames. Critical Clarification: #2 Structural is not “low quality.” It meets all engineering requirements for its designated applications. Visual defects permitted do not compromise structural performance within code-specified spans and loads. Choosing #2 over #1 for hidden framing delivers significant savings with no safety trade-off.
- #3 Structural (#3 STR): Limited structural applications. Permits larger knots, more wane, and greater defects. Strength values are lower. Typical Use: Non-critical, light-duty applications like agricultural buildings, temporary bracing, or non-load-bearing partitions only where explicitly permitted by local building code. Rarely stocked at major retailers. Important: Never substitute #3 for #2 in residential framing without explicit engineering approval. Its use is heavily restricted in modern codes for habitable structures.
- Stud Grade: Specialized grade optimized only for vertical wall studs 8 feet or less. Allows more wane and larger knots than #2 Structural in non-critical zones (e.g., near stud ends), but maintains strict requirements for the middle third where bending stress peaks. Typical Use: Standard 2×4 or 2×6 wall studs. Often more economical than #2 Structural for this specific purpose. Key Distinction: Stud grade is not interchangeable with #2 Structural for horizontal applications (joists, plates). Its grading rules address vertical compression loads only.
- Utility (UTIL): Lowest structural grade. Significant defects permitted. Typical Use: Temporary construction (scaffolding planks, formwork), blocking, or non-structural applications. Never use for permanent framing in residential structures. Commonly found as inexpensive furring strips or project panels.
Species Matters: Strength Varies Within the Same Grade
A #2 Structural Douglas Fir board possesses higher strength values than a #2 Structural Spruce-Pine-Fir (SPF) board. Grading agencies publish allowable stress values (bending strength Fb, stiffness E, compression Fc) specific to each species group within each grade. For illustrative purposes:
* #2 DF-L typically exhibits higher Fb and E values than #2 SYP, which in turn are higher than #2 SPF.
* This means a Douglas Fir joist may span slightly farther than an SPF joist of identical dimensions and grade under the same load.
Always verify species requirements in your building plans or with your local building department. Substituting a lower-strength species group without engineering review could require adjusted spacing or sizing. For DIY projects like small sheds where plans are generic, Southern Yellow Pine (SYP) or Douglas Fir (DF-L) often provide a prudent strength margin and wide availability. For deck framing specifically, SYP is frequently preferred in the Eastern U.S. for density and nail-holding; DF-L is common in Western regions.
The Appearance Grading System for Softwoods: Visual Quality for Finish Work
When wood will be visible and finished (stained, clear-coated, or painted), structural grades become irrelevant. Appearance grading takes precedence. The Western Wood Products Association (WWPA) standard is widely referenced for softwoods like pine, fir, and cedar used in trim, paneling, and furniture. Grades are primarily visual; higher appearance grades do not guarantee structural suitability.
Softwood Appearance Grades Decoded (Highest to Lowest Visual Quality)
- Finish (or “Clear”): Virtually defect-free on the primary face. No visible knots, splits, or discoloration. Grain is straight and consistent. Typical Use: High-end interior trim demanding perfection (museum moldings), clear-finish paneling. Reality Check: Extremely rare and expensive in softwoods. Often substituted with hardwoods like poplar for painted applications. Most “clear” pine available commercially is actually Select grade.
- Select (SEL): Premium appearance grade commonly available. Allows very small, tight “pin” knots (typically under 1/4 inch) and minimal sap streaks. Heartwood/sapwood variation may exist but is generally uniform. Typical Use: Stain-grade trim, cabinet faces, furniture requiring a clean look (e.g., Shaker doors), visible porch railings. Practical Tip: “Select and Better” (SEL&BTR) bundles contain Select grade and any higher grades. This often provides better value than pure Select, yielding some near-perfect boards.
- #1 Common (#1 COM): Character grade. Features small, tight knots (typically under 1/2 inch), light sap streaks, and moderate color variation between heartwood (darker) and sapwood (lighter). Knots are sound (firmly attached). Typical Use: Ideal for rustic or “farmhouse” aesthetics—barn doors, accent walls, furniture where knots add charm (live-edge style bases), porch ceilings (tongue-and-groove). Paints beautifully. Value Insight: Significantly more economical than Select, with abundant character. Many woodworkers prefer #1 Common for projects where visual storytelling matters.
- #2 Common (#2 COM): Pronounced character. Larger knots (up to 1.5 inches), more frequent knots, noticeable sapwood/heartwood contrast, minor surface checks. Knots may be “encased” (surrounded by darker wood) but should be sound. Typical Use: Paint-grade applications (baseboards, crown molding, cabinet boxes), hidden non-structural elements, rustic furniture where heavy character is desired (chunky coffee tables), garden beds. Critical Note: #2 Common is not structurally rated. Do not use it for load-bearing framing. Its strength is unpredictable due to permitted defects.
- #3 Common / Utility (UTIL): Heavy defects. Large loose knots, splits, wane, significant discoloration. Typical Use: Temporary projects, hidden blocking, workshop jigs, firewood. Rarely sold for finished projects. Sometimes used intentionally for extreme rustic art where defects are part of the aesthetic.
Appearance Nuances: Heartwood, Sapwood, and Knot Types
- Heartwood vs. Sapwood: Heartwood (inner, older wood) is typically darker, denser, and more decay-resistant. Sapwood (outer, younger wood) is lighter, softer, and more prone to moisture absorption. In appearance grades, consistent color is valued. Select grade often minimizes sapwood on the primary face. For painted projects, this distinction is irrelevant. For stain-grade work, discuss preferences with your supplier—some mills offer “all-heart” cedar or redwood bundles at a premium.
- Knot Types Matter:
- Sound Knots: Solid, firmly attached. Acceptable within grade limits. Add character.
- Encased Knots: Surrounded by darker wood. Generally sound but visually distinct. Common in #1 and #2 Common.
- Loose Knots / Knot Holes: Knots that are not firmly attached or have fallen out. Major defect. Significantly downgrades appearance and always disqualifies structural use. Inspect boards carefully—tap knots; a hollow sound indicates looseness.
- Spike Knots: Knots cut lengthwise, appearing as dark streaks. Often permitted in lower appearance grades but avoided in higher grades.
Choosing the Right Path: Structural vs. Appearance Decision Guide
Ask these questions before heading to the lumberyard:
1. Is this piece load-bearing? (Supporting weight of structure, people, snow, contents?)
* Yes → You MUST use a certified structural grade (#2 STR or better). Verify species and grade against plans or local code. Ignore appearance grades for this decision.
* No → Proceed to Question 2.
2. Will this piece be visible in the final project?
* Yes, and I plan to stain or clear-coat it → Focus on appearance grade. Choose Select for a clean look, #1 Common for subtle character, #2 Common for pronounced rustic appeal. Inspect boards individually.
* Yes, and I plan to paint it → Appearance grade matters less. #2 Common or Utility grade is often sufficient and economical. Focus on straightness and absence of major defects that could telegraph through paint (large knots, deep checks).
* No (hidden) → Structural grade only if load-bearing. If non-structural (e.g., cabinet back panel), lowest-cost appearance grade (#2 Common) or utility is appropriate. Redirect savings to visible elements.
Real-World Application: Building a backyard deck.
* Frame (Joists, Beams, Posts): Structural Grade Required. #2 Structural Southern Yellow Pine is standard and code-compliant for most residential decks. #1 Structural is a worthwhile upgrade for reduced surface checking and better appearance if the frame might be visible later. Never use #2 Common appearance grade here—it lacks structural certification and poses a safety hazard.
* Decking Boards: Appearance Focus. For real wood decking (like 5/4×6 SYP), look for “Premium” or “Select” appearance grade within pressure-treated stock. Avoid boards with large loose knots or excessive wane on the walking surface. Note: “Premium” is a commercial sorting term, not an official grade—inspect each board.
* Railings (Posts & Top Rail): Dual Requirement. Posts must be structural grade (#2 STR or better) for safety. Top rail and balusters are non-structural but visible—select appearance grade (#1 Common or Select) for best look. Many suppliers sell pre-graded railing kits meeting both criteria.
Part 2: Navigating Hardwood Lumber Grades
Hardwoods (oak, maple, cherry, walnut, ash, poplar) follow a grading philosophy centered on yield—the percentage of clear, defect-free cutting area a board can produce. Governed primarily by the National Hardwood Lumber Association (NHLA) rulebook, hardwood grading focuses less on the board’s final use and more on its potential to be cut into smaller, clear components. This is critical for furniture makers cutting parts from large boards. For DIYers buying pre-dimensioned lumber (like 1x12s), understanding NHLA logic helps interpret quality labels and pricing.
The NHLA Framework: Yield-Based Grading Explained
Unlike softwood structural grading (which assesses the entire board for strength), NHLA grading calculates the largest percentage of clear face measure (CFM)—width x length of defect-free wood—obtainable from the board’s poorer face, following strict rules about cutting size and placement. Key concepts:
* Clear Face Measure (CFM): Total area of clear, defect-free wood obtainable.
* Poorer Face Rules: The grade is assigned based on the worse of the two wide faces. The better face doesn’t determine grade (though savvy buyers inspect it!).
* Cutting Rules: Minimum cutting sizes vary by grade. Higher grades require larger minimum cuttings. Defects (knots, holes, stain, wane) cannot be included in clear cuttings.
* Size Requirements: Boards must meet minimum width and length to qualify for a grade (e.g., FAS requires boards 6″ wide and 8′ long minimum).
This system rewards boards yielding large, clear sections—ideal for tabletops, cabinet doors, or wide flooring planks. A board with beautiful figuring but a small knot might grade lower than a plainer board with no defects, because the knot reduces potential clear cutting area. NHLA grades measure yield potential, not aesthetic merit. A #1 Common board with dramatic grain may be more desirable for a specific artistic project than a bland FAS board. Understanding this liberates you to choose based on your project’s visual needs, not just the grade stamp.
Hardwood Grades Decoded: FAS to Utility
Grades apply to rough, unplaned boards. Surfaced (S4S) lumber at retail may not carry official stamps but is sorted to approximate these grades.
- FAS (Firsts and Seconds): Clarification: FAS does not stand for “First and Select” or “Fine Appearance Stock.” Historically, it combined the top two grades (“Firsts” and “Seconds”). Requirements: Minimum board size 6″ wide x 8′ long. Must yield 83 1/3% clear cuttings. Minimum cutting size: 4″ wide x 5′ long OR 3″ wide x 7′ long. What You See: Very few defects. Small, tight pin knots may be present. Excellent color consistency within species constraints. Long, straight boards. Typical Use: High-end furniture (tabletops, cabinet doors), fine cabinetry, architectural millwork requiring large, clear surfaces. Value Insight: Commands the highest price per board foot. Often unnecessary for projects involving many small parts. For solid wood tabletops, FAS provides the cleanest look with minimal glue-ups. However, carefully selected #1 Common boards can be book-matched to create stunning, character-rich tops at lower cost—many artisans prefer this approach.
- FAS One Face (F1F): One face meets FAS requirements; the other meets #1 Common requirements. Graded based on the FAS face. What You See: One near-perfect face, the reverse may have more knots or color variation. Typical Use: Projects where only one face is visible (drawer fronts, cabinet door panels, wall paneling). Excellent value—FAS quality on the show face at lower cost than full FAS. Pro Tip: Always specify which face is the “show face” when ordering. Inspect both faces.
- Select: A widely used commercial grade (not in official NHLA rulebook) bridging FAS and #1 Common. Requirements: Boards 4″ wide and up. Must yield 83 1/3% clear cuttings like FAS, BUT allows smaller minimum cutting sizes (4″ x 4′ or 3″ x 6′) and accepts boards as short as 6′. What You See: Very similar to FAS on smaller boards or boards with slightly more character. Often indistinguishable from FAS to the untrained eye. Typical Use: Same applications as FAS, especially where board length is shorter. Commonly sold as “Select” at retailers for oak, maple, and poplar. Critical Note: “Select” in hardwoods is not the same as “Select” in softwoods. Context is essential.
- #1 Common (often stamped “1C”): The versatile “cabinet grade” workhorse. Requirements: Minimum board size 3″ wide x 4′ long. Must yield 66 2/3% clear cuttings. Minimum cutting size: 4″ x 2′ OR 3″ x 3′. What You See: Noticeable character! Sound knots (typically under 1″), mineral streaks, color variation (sapwood/heartwood), small checks. Defects are well-distributed. Typical Use: Highly versatile for DIYers. Ideal for furniture (frames, legs, shelves), cabinetry (carcasses, shelves), painted projects, flooring where character is desired, and projects involving multiple small parts. Defects are often easily worked around or add desirable warmth. Value Insight: Typically significantly less expensive than FAS. Skilled woodworkers often achieve higher usable yield per dollar from #1 Common than FAS for many projects. Myth Busting: #1 Common is not “low quality.” It’s a high-yield grade perfect for its intended purposes. Many custom furniture makers exclusively use #1 Common for its character and value.
- #2 Common (often stamped “2C” or “No. 2”): Requirements: Minimum board size 3″ wide x 4′ long. Must yield 50% clear cuttings. Minimum cutting size: 3″ x 2′. What You See: Pronounced character. Larger knots, more frequent knots, significant color variation, sapwood, minor surface defects. Typical Use: Paint-grade cabinetry and furniture, rustic furniture (farm tables, benches), paneling, shelving where appearance isn’t critical, workshop projects. Excellent value for painted applications—defects disappear under paint. Sustainability Angle: Using #2 Common reduces waste. Boards downgraded for cosmetic reasons find purpose in appropriate projects.
- #3A Common & #3B Common: Lowest commercial grades. #3A requires 33 1/3% clear yield; #3B requires 25% clear yield. Heavy defects, short lengths, narrow widths. Typical Use: Pallets, crates, industrial blocking, firewood. Rarely sold to consumers. Sometimes available cheaply for extreme rustic art or garden projects where defects are embraced.
Clarifying “FAS”: History Over Hype
As noted, FAS is a historical consolidation of “Firsts” and “Seconds.” The common misconception “First and Select” fuels the belief that FAS is the absolute pinnacle of aesthetic quality. While it is the highest NHLA grade for yield potential, “quality” is subjective. A #1 Common board with dramatic cathedral grain and a single small knot might be more desirable for a specific artistic project than a bland, defect-free FAS board. NHLA grading measures potential clear cutting area, not beauty. Understanding this empowers you to choose boards based on your project’s visual needs, not just the grade stamp. A skilled woodworker can create exceptional work from #1 Common; an unskilled one might waste FAS lumber. The grade is a starting point, not a destiny.
Yield in Practice: A Concrete Illustration
Imagine a rough 8/4 (2-inch thick) Black Walnut board, 8″ wide x 10′ long.
* FAS Requirement: Must yield 83 1/3% clear area. Minimum cutting: 4″x5′. Inspector finds one 2″x3″ knot cluster. Can two 4″x5′ cuttings (40 sq ft total) be obtained around it? If total clear area meets the threshold, it grades FAS.
* #1 Common Requirement: Must yield 66 2/3% clear area. Minimum cutting: 4″x2′. Same board: The knot cluster might prevent a single large FAS cutting, but multiple smaller 4″x2′ or 3″x3′ cuttings totaling over the threshold are likely achievable. This board would likely grade #1 Common.
* Why it Matters to You: If you need two 4″x5′ pieces for table legs, the FAS board guarantees feasibility. The #1 Common board might yield them with careful layout, or require design adjustment. For small parts (drawer sides, shelf supports), the #1 Common board offers ample clear wood at lower cost. The grade informs potential yield, not whether the board is “good” or “bad” for your specific cut list.
Reading Hardwood Grade Marks (Or Navigating Their Absence)
Unlike structural softwoods, NHLA-graded hardwoods may carry a stamp on the end or edge, but it’s not universal, especially at retail. Stamps typically include grade, species code, mill ID, and sometimes NHLA logo.
Crucially: Pre-dimensioned hardwoods (S4S) sold at major retailers or online are rarely officially NHLA graded. They are sorted into commercial categories like “Premium,” “Select,” “Common,” or “Character” based loosely on NHLA standards, but consistency varies by supplier and shipment. Your eyes are your best grading tool. Always inspect boards individually:
1. Check both wide faces for knots, cracks, warp.
2. Sight down the length for bow, crook, or twist.
3. Feel the surface for tear-out or mill marks.
4. Compare color consistency if uniformity matters.
When buying rough lumber from a specialty dealer, ask: “Is this NHLA graded? Can you explain your sorting process?” Reputable dealers will clarify. For critical projects, buying rough and milling to your specifications provides greater control over final quality.
Species-Specific Grading Considerations
- Oak (Red & White): Open grain shows defects clearly. Mineral streaks (dark gray/black lines) are common and accepted in lower grades (#1 Common). Tight, small knots are preferred. White Oak commands a premium over Red Oak due to natural water resistance (tyloses block pores).
- Cherry: Highly valued for color evolution. Sapwood (pale yellow) is prominent and often minimized on the show face in higher grades. Boards sold “all-heart” (dark reddish-brown) carry a premium. Small gum spots (tiny dark pits) are generally acceptable; large spots downgrade grade. Cherry darkens significantly with age and light exposure—sapwood gradually blends closer to heartwood color.
- Maple (Hard & Soft): Hard Maple (Sugar Maple) is prized for tight grain and light color. “Birdseye” or “Curly” figure is a premium feature, not a defect—it increases value and doesn’t negatively impact grade if sound. Mineral streaks (gray/green) are common defects. Soft Maple is less dense, often used for painted projects; grading is less stringent.
- Walnut: Dark color masks some defects. Large knots or excessive sapwood significantly impact value due to the wood’s high cost. “Figured” walnut (curly, crotch) is graded separately and commands premium prices. Lower grades (#1 Common) often offer beautiful character at a fraction of FAS cost.
- Poplar: The quintessential “paint-grade hardwood.” Greenish, brown, or purple mineral streaks are common and irrelevant for painted projects. Grading focuses on soundness and freedom from large knots/splits. #2 Common poplar is extremely economical for cabinet carcasses, drawer boxes, or painted furniture frames. Don’t judge poplar by its raw color—it disappears completely under paint.
Part 3: The Lumberyard Selection Protocol
Knowledge becomes power only when applied at the point of purchase. This section provides field-tested techniques for confident, efficient lumber selection.
Step-by-Step: Decoding Structural Softwood Stamps
Follow this sequence on every structural board before selection:
1. Locate the Stamp: Usually repeated every 2-4 feet along the edge or face. Must be legible.
2. Identify the Agency: WWPA, SPIB, NELMA, or ALSC logo. Confirms grading authority.
3. Verify Species Group: DF-L, SYP, SPF, etc. Match to your project requirements. Don’t assume “pine” is sufficient—SYP has different properties than SPF.
4. Confirm the Grade: SEL STR, #1, #2, STUD. Cross-reference with your project needs. Red Flag: Missing grade stamp, stamp says “NON-STRUCTURAL,” “UTILITY,” or lacks grade designation. Do not use for framing.
5. Check Moisture Content: DRY (≤19%), MC15 (≤15%), or GRN. For interior framing, DRY or MC15 is mandatory. GRN is only for specific outdoor/temporary uses.
6. Note Mill Number: Useful for traceability if issues arise later. Not critical for selection, but good practice for large orders.
7. Scan for Additional Marks: “HT” = Heat Treated (for export). “S-Dry” = Surfaced Dry (planed after drying). “S-GRN” = Surfaced Green. Prefer S-Dry for finish work to minimize post-installation movement.
- Stamp Absent? If structural lumber lacks a stamp, do not purchase it. It hasn’t been certified. Politely inform yard staff.
- Fuzzy or Smudged Stamp? Request a different board. Legibility is part of certification requirements.
Universal Pre-Purchase Inspection Checklist (60 Seconds Per Board)
Apply this to any lumber—structural softwood, appearance softwood, or hardwood:
| Inspection Point | How to Check | Acceptable? | Reject If… | Project Impact |
|---|---|---|---|---|
| Straightness (Bow) | Sight down length along edge; place on flat surface | Slight bow often correctable | Severe curve (>1/4″ over 8′) | Causes gaps in framing; difficult to clamp for glue-ups |
| Straightness (Crook) | Sight down length along face | Minor crook often workable | Significant curve along edge | Makes alignment difficult; weakens structural member |
| Twist (Wind) | Place one corner on floor, check opposite corner clearance | Very slight twist | Corner lifts >1/8″ over 8′ | Critical failure for framing; ruins flatness for tabletops |
| Knots | Tap with fingernail; inspect size/location | Small, tight, sound knots | Loose knots, holes, large knots in critical zone (center of joist) | Loose knots = structural weakness; large knots telegraph through finish |
| Wane (Missing Wood) | Check edges for bark or missing wood | Minor wane on non-critical edge | Wane exceeds grade limits (e.g., >1/3 edge on #2 STR) | Reduces cross-section; weakens board; unsightly |
| Checks (Surface Cracks) | Run finger along grain | Fine, shallow checks | Deep cracks running across grain (splits) | Splits compromise structural integrity; checks may deepen |
| Moisture (Feel) | Touch wood; check for dampness | Dry to touch | Damp, musty smell, dark stains | Leads to mold, warping, finish failure |
| Mold/Stain | Look for blue, black, or green discoloration | Light surface mold (cleanable) | Deep-set mold, sticker stain (dark lines where stickers sat) | Mold indicates improper drying; sticker stain mars appearance |
Pro Technique: The “Flip and Compare” Method
For appearance-grade lumber, don’t just examine the top board. Flip through 5-10 boards. Compare:
* Color consistency (critical for cherry, walnut)
* Knot pattern and size
* Grain figure (straight, cathedral, curly)
* Defects you can work around vs. those you cannot
Select boards that complement each other. For a tabletop, choose boards with grain patterns that flow together. For painted cabinets, prioritize straightness over color variation.
Strategic Questions for Lumberyard Staff
Precise questions yield precise answers. Avoid vague queries like “Is this good quality?”
- “Is this lumber graded by [WWPA/SPIB/NHLA] and stamped accordingly?”
Why ask: Confirms legitimacy. Hesitation or “We sort it ourselves” is a red flag for structural lumber. For hardwoods, it opens discussion about sorting standards. - “What’s the moisture content? Is it S-Dry or GRN?”
Why ask: Critical for preventing post-installation issues. Staff should know. Uncertainty warrants caution. - “Do you have this in a higher/lower appearance grade for the same species?”
Why ask: Reveals inventory depth. A good yard stocks multiple grades. They might have #1 Common hidden behind Select bundles—perfect for character at lower cost. - “Can I pull boards from the middle of the stack? The top ones appear weathered.”
Why ask: Top boards in outdoor stacks suffer sun exposure, moisture, or damage. Reputable yards allow selection from protected layers. Refusal suggests inflexibility. - “Is there a discount for selecting boards from a lower-grade bundle?”
Why ask: Many yards sell “cull,” “mill select,” or “seconds” bundles (mixed grades, minor defects) at significant discounts. If skilled at selection, this is a high-value strategy. Staff may not advertise this—ask! - “When was this shipment received? Has it been stored under cover?”
Why ask: Freshly delivered lumber may still be adjusting. Long-term outdoor storage risks moisture damage. Indoor or covered storage is ideal.
Interpreting Staff Responses:
* “It’s all the same quality.” → Caution. Grades exist for specific reasons. This suggests lack of expertise or an attempt to move slow stock.
* “This is our premium bundle.” → Ask what makes it premium. Is it certified Select Structural? Or just the straightest boards pulled from #2 bundles? Clarify.
* “You’ll have to look through it yourself.” → Positive sign! Indicates respect for your selection skills and transparency about inventory. Embrace the process.
* “We can order exactly what you need.” → Excellent sign. Indicates a full-service yard invested in your project success. Worth building a relationship with.
Understanding Grade-Driven Pricing and Value Optimization
Lumber pricing reflects grade, species, and regional factors. Grade is often the largest cost variable after species. Strategic selection optimizes value:
- Structural Softwoods:
Select Structural typically carries a noticeable premium over #2 Structural of the same species. Justification exists only if:
(a) Engineering plans explicitly require it, OR
(b) Framing will be exposed and visual quality significantly impacts the project.
For hidden framing, #2 Structural delivers identical safety compliance at lower cost. Strategy: Allocate savings from using #2 Structural on hidden framing toward higher-grade material for visible elements. - Appearance Softwoods:
Select grade pine often costs substantially more than #1 Common. The price reflects scarcity of large, clear boards. Value Strategy:- Stain-grade visible projects: Select grade justifies cost for a clean aesthetic.
- Rustic visible projects: #1 Common provides desired character at lower cost.
- Painted projects: #2 Common is ideal. Defects vanish under paint; savings can be redirected (e.g., to hardware or finishes).
Example: For painted kitchen cabinets, #2 Common poplar or pine for frames, doors, and drawers delivers excellent results. Savings could upgrade drawer slides or countertops.
- Hardwoods (Board Foot Pricing):
Pricing is per board foot (144 cubic inches). FAS might cost significantly more per board foot than #1 Common for the same species. The Yield Reality: Higher grade doesn’t always mean more usable wood for your project. A #1 Common board might yield ample clear area for small parts at half the cost of FAS. Smart Strategy:- Calculate your project’s actual clear wood requirement.
- Estimate potential yield from lower grades.
- Choose the grade offering the best cost per square foot of usable wood for your specific parts. For small components, #1 Common almost always provides superior value. For large panels requiring minimal seams, FAS may be necessary.
Pro Tip: Buying rough lumber and milling it yourself provides greater control over final thickness and can maximize usable material from lower-grade boards.
Part 4: Project-Based Grade Selection Framework
Theory meets practice. This framework eliminates guesswork by mapping common projects to optimal grades, with rationale and adaptable alternatives. Always verify structural requirements with local building codes or a qualified engineer for load-bearing applications.
The Three-Question Decision Path
Before any project, answer:
1. LOAD-BEARING? (Supports weight beyond its own mass?)
→ Yes: Structural Grade Required. Proceed to Question 2.
→ No: Proceed to Question 3.
2. VISIBLE AFTER INSTALLATION?
→ Yes: Structural Grade + Appearance Screening. Specify “#2 Structural or better, with minimal visible defects.” Consider #1 Structural for better aesthetics if exposed.
→ No: #2 Structural (or species-specific equivalent). Minimum code-compliant grade for hidden framing. Maximize savings.
3. FINISH TYPE?
→ Stain/Clear Coat: Appearance Grade. Select for clean look; #1 Common for character.
→ Paint: Lower Appearance Grade. #2 Common softwood or #2 Common hardwood (poplar). Defects hidden.
→ Hidden (e.g., cabinet back): Lowest Cost Grade. Utility softwood or #2 Common hardwood. Redirect savings.
Grade Guidance for Common Projects
| Project | Critical Requirement | Recommended Grade(s) | Rationale | Cost-Saving Alternative | Critical Consideration |
|---|---|---|---|---|---|
| Deck Frame (Joists, Beams) | Structural Integrity | #2 Structural Southern Yellow Pine (SYP) or Douglas Fir (DF-L) | Meets IRC code for standard spans; optimal strength-to-cost ratio | #1 Structural SYP (reduces surface checking; better if frame visible later) | NEVER use appearance-grade lumber (e.g., #2 Common). Not structurally certified. Safety hazard. |
| Decking Boards (Real Wood) | Durability, Surface Quality | “Premium” or “Select” Appearance Grade within pressure-treated stock | Minimizes large knots on walking surface; better resistance to splintering | Carefully select #1 Common appearance grade PT boards; avoid knots on top face | Inspect each board. Reject boards with wane on top edge or loose knots. “Premium” is a commercial term—verify visually. |
| House Framing (Walls, Roof) | Structural Integrity, Code Compliance | #2 Structural SPF or species per local code | Standard for residential construction; certified strength values | Stud Grade for wall studs (8′ or less); modest savings vs #2 STR | Verify species requirements with local building department. SPF suitability varies by region. |
| Shed Framing | Structural Integrity (Light Duty) | #2 Structural SPF or SYP | Readily available, safe, and code-compliant for small structures | #3 Structural only if explicitly permitted by shed plans and local code | Avoid #3 unless plans specify. #2 STR provides essential safety margin for DIY projects. |
| Interior Trim (Painted) | Appearance (Painted) | #2 Common or #1 Common Pine/Poplar | Paint hides knots/defects; straightness matters more than grade | Poplar #2 Common (smoother grain than pine under paint) | Avoid boards with deep checks or loose knots—they may telegraph through paint. |
| Interior Trim (Stain-Grade) | Appearance (Clear Finish) | Select Grade Pine or Poplar | Minimal knots; consistent grain for professional finish | #1 Common with careful board selection (choose boards with small, tight knots) | Pine shows knots prominently under stain. Poplar often provides superior results for stain-grade applications. |
| Cabinet Carcass (Box) | Stability, Hidden | #2 Common Poplar or Pine | Painted interior; defects irrelevant; poplar machines cleanly | Utility Grade Plywood (for sides/top/bottom); save solid wood for doors | Ensure boards are straight. Warp in carcass causes door alignment issues. |
| Cabinet Doors (Raised Panel) | Appearance, Stability | Select or #1 Common Hardwood (Maple, Cherry) | Large clear areas needed for panels; minimal defects for clean look | #1 Common with book-matching; character adds warmth and value | Avoid boards with tension wood (shiny, silvery grain) in maple—it can cause finishing inconsistencies. |
| Kitchen Tabletop (Solid Wood) | Appearance, Stability | FAS or Select Hardwood OR carefully selected #1 Common | FAS: Large clear sections. #1 Common: Character-rich, economical | #1 Common boards book-matched for dramatic grain; often preferred by artisans | Acclimate wood 7+ days (longer in humid climates) in project environment before milling. Critical for stability. |
| Bookshelf (Visible) | Appearance, Rigidity | #1 Common Hardwood (Oak, Ash) or Select Pine | Character adds warmth; sufficient rigidity for shelves | #2 Common Poplar (painted); hides defects, very stable | For long shelves (>36″), add center support or use thicker stock (1×12 vs 1×10) to prevent sagging. |
| Bed Frame (Headboard) | Appearance | #1 Common or Select Softwood/Hardwood | Visible feature; character or clean look per design intent | Reclaimed lumber (properly milled/dried); unique character, sustainable | Ensure structural joints (mortise/tenon, bolts) are sound regardless of appearance grade. |
| Garden Bed | Durability (Outdoor) | #2 Common Cedar or Redwood (Appearance Grade) | Natural decay resistance; defects irrelevant for function | Untreated #2 Common Pine (line with plastic; replace in 3-5 years) | Avoid pressure-treated lumber for edible gardens if chemical concerns exist. Use naturally durable species. |
| Workbench Top | Durability, Flatness | #2 Common or #1 Common Hardwood (Maple, Beech) | Hard surface withstands abuse; defects add character | Multiple layers of #2 Common Plywood (MDF core); sealed well | Thickness matters more than grade. Aim for 1.5″+ thickness for stability and mass. |
| Floating Shelves | Structural + Appearance | Select Structural Hardwood OR #1 Common with engineered support | Must support weight and look good; Select Structural ensures strength | #1 Common hardwood with discrete steel bracket system; shifts load to bracket | Never rely solely on pocket screws or weak joinery. Engineer the support system for the intended load. |
| Porch Railing (Top Rail) | Structural (Posts) + Appearance (Rail) | Posts: #1 Structural SYP. Rail/Balusters: #1 Common Cedar | Posts: Safety critical. Rail: Visible; #1 Common offers character at lower cost | “Architectural Grade” SYP railing kit (graded for structure + appearance) | Verify post embedment depth and connection details meet local code. Safety is non-negotiable. |
Understanding Grade Substitutions: Safe vs. Unsafe
Generally Acceptable Substitutions (With Awareness):
* #1 Structural for #2 Structural: Always acceptable. Provides higher strength margin and better visual quality. Justified for exposed framing or critical spans. Cost is the primary consideration.
* #1 Common for Select (Appearance): Acceptable with careful board selection for minimal defects. Ideal for projects where subtle character is desired. Can yield significant savings.
* #2 Common for #1 Common (Painted Projects): Highly recommended. Defects disappear under paint. Substantial savings with no visual penalty.
* #1 Common Hardwood for FAS: Excellent strategy for projects involving multiple small parts (drawer sides, cabinet shelves). Often provides higher usable yield per dollar. Requires thoughtful layout planning.
Unsafe Substitutions (Avoid Completely):
* #2 Common (Appearance Grade) for #2 Structural (Softwood): Critical Hazard. Appearance grades are not structurally certified. Knots and defects permitted in #2 Common may critically weaken the board under load. This is a leading cause of DIY structural failures.
* Stud Grade for #2 Structural in Horizontal Applications: Stud grade is engineered only for vertical compression (studs). Its defect allowances compromise bending strength required for joists, plates, or beams.
* Utility Grade for Any Permanent Structural Element: Utility grade has unpredictable strength properties. Suitable only for temporary bracing or non-critical blocking.
* Green (GRN) Lumber for Interior Framing: Will shrink, twist, and cause drywall cracks, nail pops, and misalignment after installation. DRY or MC15 is mandatory for interior use.
The “Cull Bundle” Strategy: Value with Vigilance
Many yards sell “cull,” “mill select,” or “seconds” bundles—mixed grades, boards with minor defects—at significant discounts. This is not for beginners but a powerful tool for experienced DIYers:
1. Best For: Painted projects, hidden components, rustic furniture, workshop jigs.
2. Approach: Purchase a whole bundle. Spend time sorting:
* Pull straight, sound boards with minor, workable defects (small knots, light stain).
* Set aside heavily defective boards for discard or firewood.
* You’ll often salvage 60-80% usable material at a fraction of retail cost.
3. Critical Rule: NEVER use cull bundle lumber for structural applications unless every single board is individually verified to have a valid structural grade stamp. Assume non-structural unless proven otherwise.
4. Pro Tip: Build rapport with the yard manager. Ask when new cull bundles arrive. Early selection yields the best boards.
Common Pitfalls and Preventive Strategies
Even experienced builders encounter grading challenges. Awareness prevents frustration and project issues.
Pitfall #1: Equating “Higher Grade” with “Universally Better”
This is the most pervasive misconception. “Better” is entirely project-dependent. Using FAS walnut for hidden cabinet frames wastes resources that could enhance visible elements. Specifying Select Structural for every deck joist when #2 Structural is code-compliant consumes budget with no safety gain. Conversely, using #2 Common appearance grade pine for deck framing is dangerously inadequate. Solution: Define “better” for your specific project: Is it structural safety? Visual clarity? Character? Cost efficiency? Match the grade precisely to that definition. A #1 Common board with beautiful grain is “better” for a rustic headboard than a bland FAS board. Context is essential.
Pitfall #2: Overlooking Moisture Content and Acclimation Needs
Purchasing “dry” lumber doesn’t guarantee it’s ready for your project environment. Lumber acclimates to ambient humidity. Bringing kiln-dried (KD) lumber into a humid garage causes moisture absorption and swelling. Installing it then leads to gaps when humidity drops. Green lumber installed indoors will shrink, causing cracks and joint failure. Solution:
* For Interior Projects: Buy S-Dry (Surfaced Dry) lumber. Store it in the room where it will be installed for minimum 7 days (14 days ideal in humid climates) before milling or assembly. Use a moisture meter to verify it’s within 2% of your region’s equilibrium moisture content (typically 6-8% for interiors).
* For Exterior Projects: Pressure-treated lumber is often sold wet. Stack it stickered (with spacers between layers) in a dry, shaded area for 2-4 weeks before installation to allow surface drying and reduce warping risk. Do not install straight from the wet bundle.
* Critical Insight: Moisture-related movement (warp, cup, twist) is a leading cause of project issues—not grade defects. Proper acclimation is non-negotiable. Grade ensures the wood starts sound; acclimation helps it remain stable. Allow extra time in high-humidity regions; monitor closely in very dry environments.
Pitfall #3: Missing Post-Grading Defects
The grade stamp certifies the board met minimum standards at the mill. It doesn’t guarantee the board survived transport and storage unscathed. Common post-grading issues:
* Sticker Stain: Dark lines where stacking stickers contacted the wood during drying. Common in hardwoods. Cosmetic only, but mars appearance on visible surfaces. Inspect boards; avoid for show faces.
* Handling Damage: Dings, gouges, or splits from forklifts or rough handling. Run your hand along edges and faces.
* Mold/Mildew: Blue, black, or green fuzzy growth. Indicates prolonged moisture exposure. Surface mold can often be sanded off; deep mold compromises wood fibers. Reject heavily affected boards.
* Casehardening: Internal stress from improper kiln drying. Causes severe warping after milling. Hard to detect pre-purchase. Buy from reputable suppliers with good inventory turnover. Acclimate thoroughly.
* Insect Damage: Small holes (pinholes) or tunnels. Reject immediately—indicates active or past infestation. Can spread to other wood.
Solution: Treat the grade stamp as a starting point, not a final verdict. Perform the 60-second inspection checklist on every single board, regardless of grade. Your eyes and hands are the final quality control.
Pitfall #4: Purchasing Pre-Bundled “Project Packs” Uninspected
Retailers sell “project packs” (e.g., “8-ft Fence Post Kit,” “Deck Board Bundle”). These are often assembled from lower-grade or cull material. The bundle might contain one perfect board and seven problematic ones. Solution: Never buy pre-bundled project packs without inspection. Insist on opening the bundle and examining every board. If the store refuses (common policy), consider purchasing boards individually, selecting only sound, straight material. The time spent inspecting prevents hours of frustration and potential project failure. For large projects, special-order bundles from a local lumberyard—they’ll often pull higher-quality boards upon request.
Pitfall #5: Confusing Softwood and Hardwood Grade Terminology
Using “Select” softwood rules to judge hardwoods (or vice versa) leads to poor choices. Softwood “Select” is an appearance grade. Hardwood “Select” is a high-yield grade close to FAS. Softwood “#1 Common” is a character appearance grade. Hardwood “#1 Common” is a versatile cabinet grade. Solution: Always clarify the grading system first: “Is this graded per WWPA appearance rules?” or “Is this NHLA graded?” When uncertain, describe your visual needs: “I need boards with minimal knots for a stained tabletop” rather than relying solely on grade names.
Your Questions, Answered
Q: My deck plans specify “Use #2 or better pressure-treated lumber.” What does “or better” mean? Can I use #1?
A: “Or better” refers to structural grade, not appearance. #1 Structural is a higher structural grade than #2 Structural and is acceptable (often recommended for reduced surface checking). It does not mean you can substitute #1 Common appearance grade—that lacks structural certification. Verify the stamp says “#1 STR” or “SELECT STR,” not “#1 COM.”
Q: I see “Premium” grade on pressure-treated decking. Is that a real grade? What does it mean?
A: “Premium” is a marketing term, not an official ALSC or WWPA grade. It generally indicates the mill has visually sorted the pressure-treated stock for fewer knots, less wane, and straighter boards—essentially an appearance upgrade within the structural grade (usually #2 STR). It’s often worth the slight premium for decking where the top surface is visible. However, standards vary by mill, so inspect boards individually regardless of labeling.
Q: Can I use construction-grade (#2 Structural) lumber for indoor furniture if I plane and sand it smooth?
A: Technically possible, but with significant caveats. #2 Structural softwood (like SPF) often contains large knots, wane, and inconsistent color that remain visible after finishing. It’s less dense than hardwoods, dents more easily, and may have mill glaze hindering finish adhesion. For rustic furniture (farm table base, industrial shelf brackets), it can work well. For fine furniture, appearance-grade softwood (#1 Common pine) or hardwoods typically yield better results. If attempting it:
– Select boards with tight, sound knots.
– Avoid boards with wane or loose knots.
– Expect potential tear-out when planing due to density variations around knots.
– Use a sanding sealer before final finish to minimize blotchiness.
For most indoor furniture projects, purpose-sorted appearance-grade material provides better value and results.
Q: What’s the difference between “S4S” and “Rough Cut” lumber, and how does it affect grade?
A: S4S (Surfaced Four Sides) is planed smooth on all sides to nominal dimensions (e.g., a “1×12″ is actually 3/4″ x 11.25″). Rough Cut is unsurfaced, full thickness (e.g., 4/4 = 1” thick), requiring milling. Grade Impact:
– Rough Lumber: Graded in rough state per NHLA (hardwoods) or appearance rules. You see the true board, defects, and potential. You control final thickness and can often maximize usable material. Best value for skilled woodworkers.
– S4S Lumber: Often not officially graded. Sorted commercially (“Select,” “Common”). Planing removes material, potentially revealing defects unacceptable at finished thickness. Inspect meticulously. Convenient for beginners but higher cost per usable inch.
Recommendation: For critical projects or maximum value, buy rough and mill yourself. For small projects or beginners, buy S4S but inspect every board thoroughly before purchase.
Q: I found old lumber stamped with a grade but no current agency logo. Is it still usable?
A: Historical grading stamps (e.g., older USDA marks) reflect the standards of their time. The critical factors are:
1. Condition: Is it dry? Free of rot, insect damage, severe cracks? Tap it—solid sound is good; hollow sound indicates decay.
2. Species: Older lumber may be old-growth (tighter grain, often more stable) which can be superior to some modern lumber.
3. Moisture: Acclimate it thoroughly before use.
If structurally sound and properly acclimated, reclaimed graded lumber can be excellent. For structural use in critical applications, consult a qualified professional if safety is a concern. For non-structural projects, condition is the primary consideration.
Q: Why do two boards with the same grade stamp look completely different?
A: Grading sets minimum standards, not uniformity. A #2 Structural board meets the minimum requirements for that grade—it can have defects right at the allowable limit, or be nearly flawless. Similarly, two FAS hardwood boards can vary in color, grain pattern, and minor defect placement while both meeting the 83 1/3% clear yield requirement. This is why individual board selection is crucial. The grade guarantees a baseline; your inspection selects the best boards within that grade for your specific project needs.
Q: Does pressure-treating change the lumber grade?
A: No. Pressure-treating is a preservative process applied after grading. The structural or appearance grade is assigned to the wood before treatment. However, the treatment process (chemical infusion, kiln redrying) can sometimes cause additional warping or surface checking. Always inspect pressure-treated lumber after purchase and before installation. When available, select “KD” (Kiln-Dried after Treatment) lumber—it’s drier and more stable than standard “green” treated lumber.
Q: I’m building a tiny house on a trailer. Do I need special lumber grades?
A: Yes. Tiny houses on trailers experience dynamic loads (vibration, twisting) unlike stationary structures. Many jurisdictions require higher-grade materials. Common considerations:
– Framing: #1 Structural or Select Structural (not #2) for increased strength and stiffness.
– Sheathing: Minimum 7/16″ APA-rated plywood (not OSB) for better screw-holding and moisture resistance.
– Critical: Consult your local building department and the trailer manufacturer. Many require engineered plans stamped by a licensed structural engineer familiar with mobile/tiny home dynamics. Do not rely solely on standard residential grading rules. Safety margins must be higher for mobile applications.
Q: How do Canadian (CSA) lumber grades compare to US grades?
A: Very similar, with minor differences. CSA O141 is the Canadian standard. Key equivalencies:
– CSA “Select Structural” ≈ US “Select Structural”
– CSA “#1” ≈ US “#1 Structural”
– CSA “#2” ≈ US “#2 Structural”
– CSA “Standard” ≈ US “#3 Structural” (use with caution)
For appearance grades, differences are more pronounced. When buying Canadian lumber in the US (common with SPF), verify the grading agency stamp (CSA logo). For structural applications, CSA-graded lumber is generally accepted under US building codes due to mutual recognition agreements, but confirm with your local building official. For DIY projects, treat CSA #2 as functionally equivalent to US #2 Structural, but always verify with local requirements.
Q: What should I do if I accidentally bought the wrong grade?
A: Assess calmly:
1. Structural Error (e.g., bought #2 Common for framing): STOP. DO NOT USE. Return it immediately. Using non-structural lumber for framing is unsafe and violates code. Explain the mistake to the supplier—they may exchange it.
2. Appearance Error (e.g., bought #2 Common for stain-grade trim): Options:
– Paint it: Embrace the character; #2 Common paints beautifully.
– Repurpose: Use it for hidden parts (cabinet backs, workshop shelves).
– Exchange: Many yards allow exchanges if uncut and in good condition.
– Work with it: Fill knots with tinted epoxy; incorporate defects as design features.
3. Prevention: Take a photo of the grade stamp before leaving the store. Compare it to your project plan. When uncertain, ask yard staff to verify.
Q: Are there sustainable considerations when choosing lumber grades?
A: Absolutely. Strategic grade selection supports sustainability:
– Use Lower Appearance Grades (#2 Common, Utility) for Painted/Hidden Projects: Maximizes yield from each log. Boards downgraded for cosmetic reasons find purpose instead of becoming waste.
– Choose Certified Lumber: Look for FSC (Forest Stewardship Council) or SFI (Sustainable Forestry Initiative) chain-of-custody certification stamps. Certification is separate from grade—ask for certified lumber in your chosen grade.
– Consider Reclaimed Lumber: Salvaged from old buildings. Often old-growth, extremely stable, and full of character. Grading is informal—inspect carefully for nails, rot, or insect damage.
– Optimize Project Design: Design to use standard lengths and widths, minimizing cutoff waste. Plan cuts to work around defects in lower-grade boards.
Choosing #1 Common instead of FAS for a project where character is acceptable isn’t just economical—it’s an environmentally conscious choice that reduces pressure on high-grade timber resources.
Conclusion and Your Path Forward
Lumber grading is not a barrier to be feared, but a practical language to be learned—a precise vocabulary that empowers smarter, safer, and more intentional building. You now hold the keys to decode stamps, navigate the lumberyard with purpose, and align every board selection with your project’s true needs. Remember the core principles: structural grades safeguard safety; appearance grades serve aesthetics; and the “right” grade is always the one that delivers exactly what your project requires—no more, no less. This knowledge transforms lumber from a commodity into a conscious choice. You’ll avoid costly mismatches that compromise safety or aesthetics. You’ll allocate your budget strategically, investing in premium grades only where they deliver visible or functional value, and confidently selecting economical grades where defects are irrelevant. You’ll reduce waste by embracing character in appropriate applications. Most importantly, you’ll build with greater confidence, knowing each decision is informed and intentional.
Recap: Three Foundational Principles
- Separate Structure from Appearance: Never conflate the two systems. Load-bearing = certified structural grade required. Visible finish = appearance grade selection. When both matter, specify both criteria clearly.
- Inspect Every Board: The grade stamp is a promise of minimum standards at the mill. Your 60-second inspection is the final quality control. Straightness, sound knots, absence of hidden defects—these determine success more than the grade letter alone.
- Match Grade to Project Reality: Define “better” for your project. FAS isn’t universally superior; #2 Structural isn’t inferior. The optimal grade delivers required performance at appropriate cost for this specific application.
The 24-Hour Action Step
Within the next 24 hours, take one concrete step to cement this knowledge:
➡️ Visit your local lumberyard or home center. Don’t buy anything. Spend 15 minutes:
– Find a structural softwood bundle. Locate and decode three grade stamps using the framework in Part 3.
– Flip through a hardwood stack (poplar or oak). Compare the visual differences between boards labeled “Select” and “#1 Common.” Note knot size, color variation, grain.
– Ask one staff member: “What’s the most common grading question you help customers with?”
This micro-action transforms theory into tangible experience. You’ll return home not just informed, but confident.
The Broader Perspective: Grading as Part of Thoughtful Building
Mastering lumber grades represents a milestone in your journey as a creator. It signifies a shift from following instructions passively to making informed, intentional choices. This mindset extends far beyond the lumber aisle—to selecting fasteners, understanding wood movement, interpreting building codes, and designing projects that are safe, beautiful, and resource-conscious. You join a community of thoughtful builders who respect materials, honor craftsmanship, and build with purpose. The next time you stand before a wall of lumber, you won’t see confusion. You’ll see potential. You’ll see the perfect board for your project, waiting to be chosen. Go build something great.
Explore Our Complete Woodworking and Building Series:
Understanding Wood Movement: Prevent Warping and Cracking | The DIYer’s Guide to Reading Building Plans | Pressure-Treated Lumber: Safety, Selection, and Finishing | Essential Workshop Layouts for Small Spaces | Mastering Wood Joinery: From Butt Joints to Dovetails | Sustainable Sourcing: Choosing Eco-Friendly Building Materials | The Complete Guide to Wood Finishes and Sealers