Reduce buffering, dropouts, and dead zones. Build a dependable home network from the ground up with this step-by-step framework—designed for stability, scalability, and peace of mind.
Imagine this: Your video call freezes mid-sentence during a critical work presentation. Your child’s online class disconnects for the third time today. The smart doorbell fails to alert you as a delivery arrives. These aren’t just annoyances—they’re symptoms of a fragile digital foundation undermining your home’s functionality. True connectivity isn’t about chasing headline speeds; it’s about creating an invisible infrastructure so dependable you rarely notice it. This guide transforms network setup from a technical chore into a strategic system built on established principles of physics, architecture, and human behavior. By the final page, you’ll possess a clear, actionable blueprint tailored to your home’s unique layout, usage patterns, and evolving needs—without overpromising perfection or relying on unverifiable claims.
Introduction: Beyond the Router-in-a-Box Mentality
For years, the home networking industry sold us a simple promise: plug in this shiny box, and enjoy seamless connectivity. Yet many households remain trapped in a cycle of rebooting modems, wrestling with signal extenders that create new complications, and accepting inconsistent performance. This frustration stems from a fundamental misconception—that a single device can overcome the complex interplay of building materials, electromagnetic interference, household routines, and evolving technology demands. A truly reliable network operates like your home’s electrical system: thoughtfully designed, properly scaled, and nearly invisible in daily life. It anticipates needs before they become emergencies. It adapts as your family grows, your work evolves, and new devices enter your ecosystem. Whether you live in a century-old brick bungalow, a modern open-concept townhouse, or a sprawling suburban estate, the path to reliability begins not with buying gear, but with understanding your space and habits. This guide synthesizes widely accepted engineering practices with real-world applicability—no jargon, no fluff, just clear strategies that work consistently across diverse living environments. We’ll move beyond marketing language to focus on what creates tangible stability: intentional design, strategic component selection, and intelligent management. Your journey to a network that consistently supports your life starts now.
The Three-Layer Reliability Framework: Foundation, Coverage, Intelligence
Most network guides jump straight to product recommendations—a path to frustration. True resilience emerges from a deliberate three-layer architecture. Think of it like building a house: you wouldn’t install light fixtures before pouring a solid foundation. Similarly, skipping foundational layers guarantees ongoing instability. This framework creates interdependent strength where each layer supports and enhances the others. Neglect one layer, and the entire system becomes vulnerable. Master all three, and you achieve what network professionals describe as “graceful degradation”—when one component faces stress (like a microwave interfering with Wi-Fi), the system compensates without collapsing. Let’s build your network intelligently, layer by layer.
Layer 1: The Wired Foundation – Your Network’s Spine
Before a single wireless signal flies, we establish a physical backbone. This layer handles your most critical, bandwidth-hungry, and latency-sensitive devices through Ethernet cables. Why wired? Physics is consistent: copper cables deliver stable speeds with minimal interference, very low latency, and high reliability. Wireless is convenient for mobile devices, but it shares contested airspace. Your foundation layer reserves wireless capacity for what truly needs mobility while anchoring stability where it matters most.
Why This Layer Matters:
Consider a household streaming video on the main TV, attending a virtual meeting on a desktop workstation, and backing up security camera footage simultaneously. All three tasks demand sustained, uninterrupted data flow. If these devices rely solely on Wi-Fi, they compete for airtime. Nearby appliances, neighboring networks, or even physical obstacles can introduce interference that disrupts multiple activities. By hardwiring these anchor points, you eliminate this competition. Homes with strategic Ethernet runs often report noticeably fewer connectivity frustrations. This approach also supports future needs. Today’s smart TVs might have adequate Wi-Fi, but tomorrow’s higher-resolution streaming devices, immersive workstations, or home servers will benefit from the raw throughput and stability only Ethernet provides. Installing cable during accessible moments is typically less disruptive than retrofitting later.
Step-by-Step Implementation Guide:
Mapping Your Anchor Points: Walk through your home with a notebook. Identify every location where a device stays permanently plugged in and benefits from maximum performance:
– Primary entertainment center (TV, streaming box, game console)
– Home office desktop or workstation
– Network-attached storage (NAS) device location
– Security system hub or NVR (Network Video Recorder)
– Smart home hub (if centrally located)
– Printer station
– Any location where you frequently use a laptop plugged into Ethernet
Choosing the Right Cable:
– Cat 6: A strong choice for most homes. Supports Gigabit speeds reliably and offers good shielding against interference. Ideal for runs under 100 feet.
– Cat 6a: Consider for longer runs (over 100 feet), homes with significant potential interference sources (near large appliances, power panels), or if you’re building new and want added headroom.
– Cat 5e: May be sufficient for basic Gigabit needs in less demanding environments, though Cat 6 is generally preferred for new installations due to better shielding.
– Critical Tip: Always verify local building and fire codes. Cable marked “CMP” (Plenum-rated) is required for air-handling spaces like drop ceilings in many jurisdictions. For standard wall cavities, “CMR” (Riser-rated) is typically appropriate. When in doubt, consult a qualified professional.
Running Cable Strategically:
– New Construction/Renovation: This is the ideal time. Work with your electrician or low-voltage specialist to install conduit (½” or ¾” flexible non-metallic conduit) between key locations: basement/crawlspace to each anchor point, attic to upper floors. Conduit allows easier cable replacement or upgrades years later without demolition. Place low-voltage wall plates (with keystone jacks) at each endpoint.
– Existing Home (No Walls Open): Practical approaches include:
– Baseboard Route: Carefully remove baseboards. Run cable along the floor-wall joint, then reattach baseboards over it. Use a drill with a long bit to pass cable between floors through closet corners or inside cabinets.
– Attic/Crawlspace Access: Drop cables down interior walls from the attic (using a fish tape) or up from the crawlspace. Patch small holes in drywall with spackle.
– Door/Window Trim: Run flat cable along thresholds or window trim, secured with low-profile cable clips.
– Furniture Concealment: Route cables behind bookshelves, along the back of entertainment centers, or under area rugs (using flat cable to avoid tripping hazards).
– Renters: Focus on non-invasive methods. Use cable management sleeves along baseboards, run cables through existing pathways (checking landlord rules first), or utilize surface-mount raceways painted to match walls. Always document the original state for move-out.
Termination and Testing:
– Install keystone jacks at endpoints using a punch-down tool. Consistently follow the T568B wiring standard (orange-white, orange, green-white, blue, blue-white, green, brown-white, brown).
– At your central location (where the modem/router lives), terminate cables into a patch panel mounted on a small rack or shelf. This creates a clean, organized hub.
– Essential: Test every single run with a cable tester before finalizing routes. A modest investment in testing prevents significant frustration later. Verify all connections are secure. Label both ends clearly (e.g., “TV-LR,” “Office-Desk”).
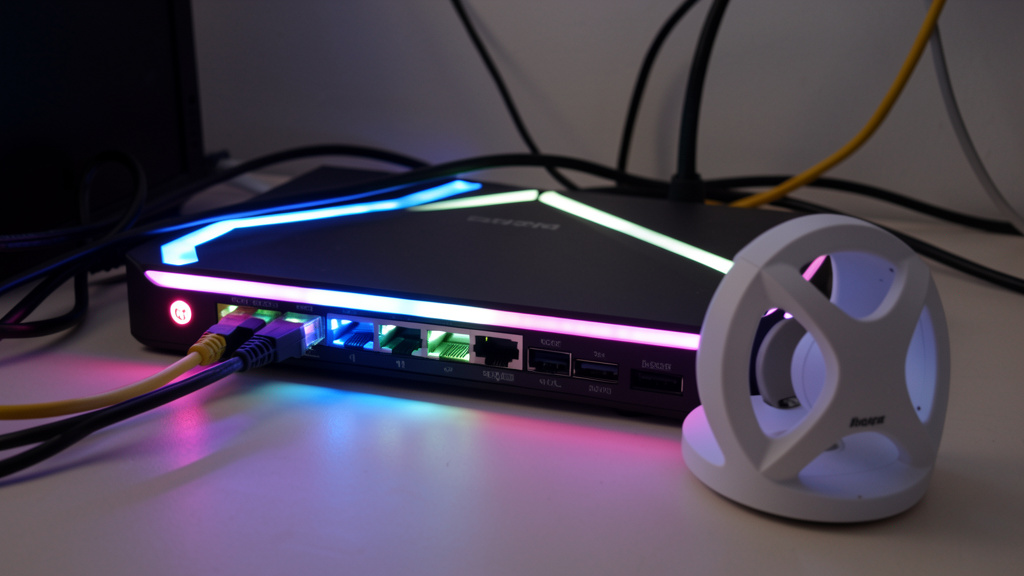
– Connect the patch panel to a Gigabit (or better) network switch. This small device expands your router’s limited ports. Choose an unmanaged switch for simplicity (e.g., TP-Link TL-SG108) or a managed switch if you anticipate needing advanced features later. Ensure the switch supports the speeds of your cables.
Common Foundation Layer Considerations:
– The Switch Role: Plugging many devices directly into the router can overwhelm its internal networking capabilities. A dedicated switch efficiently manages local traffic.
– Cable Quality: Very low-cost cables may lack adequate shielding, potentially acting as antennas for interference. Reputable brands typically offer better consistency.
– Cable Length: Ethernet has practical distance limitations for reliable operation. Plan routes accordingly; a switch can extend coverage for longer paths.
– Termination Quality: Loose connections in jacks cause intermittent issues. Practice on scrap cable first. A clean punch-down ensures solid contact.
– Central Hub Location: Place your patch panel/switch near your modem in a cool, ventilated spot—not stuffed inside a closed cabinet where heat builds up.
The Fundamental Principle: A robust wired foundation doesn’t replace Wi-Fi; it liberates wireless capacity to perform more reliably for mobile devices by removing heavy, constant traffic burdens.
Layer 2: The Wireless Coverage Strategy – Precision Over Power
With your foundation secure, we design the wireless layer not as a single blast of signal, but as a carefully mapped ecosystem of access points. Forget “more bars = better.” True coverage is about consistent signal quality and seamless transitions between zones. A single router blasting at maximum power often creates unpredictable dead zones and “sticky client” problems where devices cling to a weak signal instead of switching to a stronger one nearby. Our strategy uses multiple access points (APs) working in harmony—a mesh-like system implemented with components chosen for control and performance.
Why Single-Router Setups Often Fall Short:
Physics influences wireless behavior. Wi-Fi signals interact with common home materials:
– Concrete/Brick Walls: Can significantly attenuate signal, often reducing usable range.
– Metal: Acts as a strong barrier (filing cabinets, ductwork, mirrored walls).
– Water: Large aquariums, full bathtubs, and even the human body absorb signal.
– Electromagnetic Noise: Microwaves, cordless phones, baby monitors, and neighboring Wi-Fi networks create congestion, especially on the 2.4GHz band.
A single router placed centrally might cover square footage on paper, but real-world obstacles create voids. Boosting transmit power rarely solves penetration issues and can increase interference for neighbors. The professional approach: place multiple access points strategically to create overlapping zones of strong signal, like cellular towers covering a city. This helps devices connect to the closest, strongest AP without dropping sessions during movement.
Step-by-Step Coverage Mapping:
Conduct a Pre-Installation Site Survey (No Gear Needed Yet):
1. Sketch a simple floor plan of your home.
2. Walk through each room at typical usage heights (desk level, couch height, bedside table).
3. On your phone, open a free Wi-Fi analyzer app (like WiFi Analyzer for Android or NetSpot free version).
4. Note signal strength (RSSI) in dBm:
– -30 to -50 dBm: Excellent (typically very close to AP)
– -50 to -65 dBm: Very Good (ideal target zone)
– -65 to -75 dBm: Acceptable (minimum for HD streaming)
– Below -75 dBm: Poor (likely buffering, disconnects)
5. Mark problem areas: “Weak signal in master bathroom,” “Dead zone in basement workshop.”
6. Identify ideal AP locations: Near electrical outlets, elevated (not floor-level), away from large metal objects or appliances. Prioritize covering the weak spots noted in Step 4.
Selecting Your Access Point System:
– Option A: Dedicated Access Points + Controller (Recommended where feasible):
Install multiple standalone APs (e.g., Ubiquiti U6-Lite, TP-Link Omada EAP660) connected via Ethernet backhaul (from your Layer 1 foundation!) to a central controller (software or cloud-based). Key advantages:
– Ethernet backhaul provides full bandwidth between APs—avoiding the bandwidth sharing inherent in wireless mesh backhauls.
– Centralized management: Adjust settings for all APs simultaneously.
– Seamless roaming: Devices typically switch APs quickly enough that activities like video calls continue uninterrupted.
– Band steering: Gently guides capable devices to less congested bands.
– Ideal for homes over 1,800 sq ft, multi-story, or with challenging layouts.
– Option B: Premium Tri-Band Mesh System (Practical for constrained situations):
Systems like Eero Pro 6E, Nest Wifi Pro, or TP-Link Deco XE75 use a dedicated wireless band (often 6GHz) for communication between nodes. Important considerations:
– Place nodes within reasonable line-of-sight where possible; avoid enclosing them in metal cabinets.
– Effective range between nodes varies significantly by environment; dense walls reduce it.
– Performance can diminish with each wireless hop; limiting to 2–3 nodes is often advisable for reliability.
– Verify the system’s real-world throughput aligns with your internet plan and usage needs.
– Generally Avoid: Single-band extenders/repeaters. They often halve available bandwidth, create separate network names (SSIDs), and cause roaming difficulties. They may show signal where none existed, but rarely improve actual performance.
Optimal Placement Principles:
– Height Matters: Mount APs 5–7 feet high. Signals radiate outward; placing too low creates weak spots directly below.
– Avoid Obstruction: Keep APs away from large appliances, microwaves, cordless phone bases, and metal objects.
– Corner Strategy: For L-shaped homes, place an AP near the corner of the connecting hallway to cover both sections effectively.
– Multi-Story Tip: Position APs to cover vertical transitions—between main and upper level, or main and basement. Avoid attics unless the AP is rated for high temperatures.
– Renters’ Approach: Use adhesive-backed mounting plates (included with many APs) on walls near outlets. Run flat Ethernet cable along baseboards to the nearest anchor point from Layer 1. Remove cleanly later.
Configuration for Smooth Roaming:
1. Single Network Name (SSID): Use identical SSID and password for all bands across all APs.
2. Band Steering: Enable if available. Helps capable devices use the less congested 5GHz band.
3. Transmit Power Tuning: Set APs to Medium power (not Max!). High power can cause overlapping cells to interfere. Let devices connect to the closest AP naturally.
4. Channel Planning (Especially in dense areas):
– 2.4GHz: Use channels 1, 6, or 11 (non-overlapping in North America). Use your Wi-Fi analyzer to select the least congested option.
– 5GHz/6GHz: Enable “Auto” channel selection with DFS (Dynamic Frequency Selection) support where available. DFS channels are often less crowded.
5. Roaming Assistance: Some systems allow setting a signal threshold (e.g., -70 dBm) where devices are encouraged to switch to a stronger AP, reducing “sticky client” behavior.
Real-World Coverage Scenarios Addressed:
– The Brick Bungalow (1,200 sq ft, thick walls): One centrally located AP struggles in bedrooms. Solution: Run Ethernet to a second AP in the hallway outside bedrooms. Adjust transmit power. Result: More consistent signal throughout.
– The Split-Level Home (Three distinct levels): Router in living room leaves basement and upper loft weak. Solution: AP mounted between main and upper level; second AP in basement rec room (connected via Ethernet run).
– The Open-Concept Loft (High ceilings, metal beams): Signal reflects unpredictably. Solution: Two APs placed at opposite ends, mounted lower to focus coverage downward, with transmit power adjusted to reduce multipath interference.
– The Apartment Dweller (Concrete walls, neighbor interference): Single premium mesh node near center. Use Wi-Fi analyzer to select the cleanest 5GHz channel. Enable band steering. Minimize reliance on 2.4GHz for critical devices if possible.
Wireless Layer Considerations:
– Client Device Capabilities: An older smart TV may only use 2.4GHz. Design coverage with your most critical devices in mind.
– 6GHz Band (Wi-Fi 6E/7): If investing in new equipment, systems with 6GHz capability offer a less congested band—beneficial for demanding applications in dense wireless environments. Requires compatible client devices.
– Post-Install Verification: After setup, repeat your site survey. Confirm weak spots are resolved and signal stays within acceptable ranges in all usage areas. Adjust placement or settings if needed.
– Outdoor Needs: For patio or garage coverage, consider an outdoor-rated AP mounted under eaves, connected via weatherproof conduit.
Layer 3: The Intelligence Layer – Management, Security, and Optimization
A network built on Layers 1 and 2 has inherent stability. Layer 3 adds proactive management—preventing issues before they disrupt your life, securing your digital household, and adapting to changing needs. This layer transforms your network from a static utility into a responsive system. It’s where you gain visibility, control, and confidence. Without it, even a well-built network can become a “black box” you only notice when it fails.
Network Monitoring: Gaining Visibility
You wouldn’t drive a car without gauges. Implement lightweight monitoring to track health:
– Built-in Tools: Most premium systems offer apps showing connected devices, real-time bandwidth usage, and uptime history. A quick weekly check is often sufficient.
– Dedicated Monitoring (Optional): Tools like GlassWire (PC) or Fing (mobile app) provide broader visibility:
– See which device is using bandwidth currently
– Detect unfamiliar devices (potential security consideration)
– Set alerts for unusual activity patterns
– Baseline Tracking: Note your typical speeds (use Speedtest.net at different times). Sudden, sustained drops can indicate ISP issues or internal problems. In dense neighborhoods, periodically check Wi-Fi channel congestion and adjust if needed.
Security: Layered Practices for Your Digital Home
Security is ongoing practices, not a single setting. Implement these widely recommended steps:
– Strong, Unique Passwords:
– Admin Passwords: Change default router/AP admin passwords immediately. Use a long, unique passphrase. Never reuse passwords.
– Wi-Fi Password: Use WPA3 encryption if all your devices support it. If not, WPA2-AES is acceptable. Avoid outdated protocols like WEP. Choose a strong password (12+ characters, mix character types).
– Network Segmentation (Highly Recommended):
Create separate virtual networks (SSIDs) for different device types:
– Primary Network: For laptops, phones, tablets—devices you control and update regularly.
– IoT Network: For smart bulbs, plugs, cameras, thermostats. These devices often have limited security updates. Isolating them helps contain potential issues.
– Guest Network: For visitors. Disable access to your local network (so guests can’t see printers or storage devices). Set a separate password.
Most business-grade APs and many premium consumer systems support this segmentation.
– Firmware Updates: Enable automatic updates if available. If manual, check quarterly for updates—manufacturers release patches for vulnerabilities.
– Disable Unused Features: Turn off WPS (Wi-Fi Protected Setup)—it has known security weaknesses. Disable remote admin access unless absolutely necessary.
– Thoughtful Parental Controls: Instead of rigid time limits:
– Pause Internet: Temporarily disable Wi-Fi for specific devices (e.g., during family dinner).
– Content Filtering: Block categories at the network level via OpenDNS or router settings if desired.
– Scheduled Access: Automatically disable the IoT network overnight when many devices don’t require cloud access.
Traffic Optimization: Prioritizing What Matters
Not all data has the same urgency. A video call needs low latency; a cloud backup can be flexible. Implement Quality of Service (QoS) thoughtfully:
– Identify Priority Traffic:
– Critical: Video conferencing (Zoom, Teams), VoIP phones, online gaming.
– High: Streaming video, security camera live view.
– Background: Cloud backups, software updates, smart home firmware updates.
– Configure QoS Rules (If Supported):
In your router/AP controller:
1. Assign devices or traffic types to categories.
2. Set bandwidth limits for background tasks (e.g., “Limit NAS backup to 20 Mbps”).
3. Enable “Smart QoS” if available—it often identifies traffic types automatically.
Example: During a Teams call, QoS helps ensure your laptop gets priority bandwidth. The smart TV’s stream might briefly adjust resolution, but your call remains clear. Without QoS, background tasks could impact real-time activities.
– DNS Considerations: Replace your ISP’s DNS with a reputable alternative:
– Cloudflare (1.1.1.1): Known for speed and privacy focus.
– Quad9 (9.9.9.9): Blocks known malicious domains.
– NextDNS: Offers advanced filtering and logging (has free and paid tiers).
Change DNS settings on your router to apply network-wide.
Practical Maintenance Habits:
– Monthly: Reboot modem and main router/AP (unplug 30 seconds). Clears temporary glitches. Check for firmware updates. Review connected devices list.
– Quarterly: Re-run Wi-Fi site survey. Adjust AP channels if neighborhood congestion changes. Verify wired speeds at anchor points.
– Annually: Review passwords and segmentation rules. Check physical connections. Update your network documentation.
– After Major Changes: New construction? Added devices? Reassess coverage and settings.
Intelligence Layer Considerations:
– Alerts: Treat system alerts seriously—they often indicate developing issues.
– Rule Complexity: Start with 2–3 simple QoS rules. Overly complex rules can cause unexpected behavior.
– Configuration Backups: Export your router/AP settings periodically. If hardware fails, restoration is faster.
– Ongoing Attention: Networks evolve. Schedule brief quarterly check-ins, similar to other home maintenance.
Navigating Real-World Constraints: Budgets, Rentals, and Legacy Homes
Theory meets reality. Let’s address common friction points. Your situation isn’t a barrier—it’s a design parameter. We’ll adapt the framework without sacrificing core reliability principles.
The Budget Spectrum: Smart Investment at Every Level
Reliability is about spending wisely, not necessarily most. Allocate funds where they deliver the greatest stability benefit.
Budget Tier ($150–$300 Total): The Strategic Starter
Ideal for: Apartments, studios, small homes (<1,200 sq ft), renters, first-time setup.
Philosophy: Maximize impact with minimal components. Prioritize foundation where feasible.
– Modem: If your ISP allows it, buy your own certified modem instead of renting. Verify compatibility first! This often saves $10–$15 monthly.
– Router/AP: A single high-quality Wi-Fi 6 router (e.g., TP-Link Archer AX55, Asus RT-AX55). Focus on stability features over flashy aesthetics.
– Foundation Hack: Run one critical Ethernet cable: From modem location to your main workstation or entertainment center. Use the router’s built-in switch ports. This single run anchors your most important traffic.
– Coverage Boost: If dead zones exist after assessment, consider adding one Ethernet-connected access point later. Avoid wireless extenders if possible.
– Intelligence: Use free tools: Fing app for monitoring, Cloudflare DNS, built-in parental controls.
Why it works: Anchoring one critical device wired and choosing a competent single AP avoids common pitfalls. You’ve built a scalable base—add APs later via Ethernet.
Mid-Tier ($300–$700 Total): The Balanced Builder
Ideal for: Most single-family homes (1,200–2,500 sq ft), multi-story, growing smart homes.
Philosophy: Implement all three framework layers intentionally.
– Modem: Owned certified modem.
– Foundation: Run Ethernet to 2–3 key anchor points (office, TV, NAS location). Install a simple 8-port Gigabit switch.
– Coverage: Two dedicated access points connected via Ethernet backhaul. Managed via free controller software.
– Intelligence: Full network segmentation (Primary, IoT, Guest). Basic QoS rules. Scheduled reboots.
Why it works: Ethernet backhaul between APs avoids wireless mesh bottlenecks. Centralized management simplifies future adjustments. Segmentation reduces security risk from IoT devices. This setup handles typical household device counts comfortably.
Premium Tier ($700+ Total): The Future-Ready System
Ideal for: Large homes (>2,500 sq ft), estates, tech enthusiasts, home offices requiring high reliability, new construction.
Philosophy: Professional-grade components, redundancy, advanced features.
– Modem: Owned modem suitable for your internet plan speed.
– Foundation: Structured wiring: Conduit runs to key rooms, central patch panel, managed switch.
– Coverage: 3+ Wi-Fi 6E/7 access points with seamless roaming. Outdoor AP if needed.
– Intelligence: Advanced VLANs, firewall rules, traffic shaping, network-wide ad blocking (Pi-hole), UPS backup for critical gear.
Why it works: This approach mirrors robust small-business network design. Redundancy (e.g., dual WAN ports for failover internet) enhances uptime. Professional components are built for continuous operation. You’re leveraging established engineering practices.
Budget Allocation Guidance:
– Foundation Quality: Investing in proper cable and termination prevents elusive intermittent issues.
– APs over Router Hype: A business-grade access point often provides more stable coverage than a consumer “gaming router” with similar price. Prioritize radio quality and management features.
– Switch Reliability: A quality switch is essential. Stick with reputable networking brands.
– Time vs. Cost: If running cable causes significant stress, hiring a low-voltage specialist just for the wiring can be a wise hybrid approach. You handle configuration. This optimizes both cost and peace of mind.
Rental-Friendly Solutions: No Nails, No Drama, Full Function
Landlord restrictions don’t mean accepting poor connectivity. These methods minimize permanent changes.
The Non-Invasive Foundation:
– Flat Ethernet Cable: Run under door thresholds, along baseboards, or behind furniture. Use removable adhesive clips every 12 inches. Paint clips to match walls.
– Surface-Mount Raceways: Slim plastic channels adhere to walls with strong tape. Run cable inside, snap lid shut. Remove cleanly; tape residue typically wipes off.
– Furniture Routing: Thread cable behind bookshelves, along headboards, or under area rugs (use flat cable).
– Powerline Adapters (Use Cautiously): Only consider if:
– Your home has modern wiring on the same electrical circuit between points.
– You need modest speeds.
– Test before committing: Performance varies significantly by home wiring. Avoid with older wiring types or many circuit breakers between points.
Best Practice: Use powerline only for a single critical device where running cable is impossible. Don’t rely on it for whole-home coverage.
Wireless Strategy for Rentals:
– Premium Mesh System: Eero Pro 6E or Nest Wifi Pro. Place main unit near modem. Position satellites in open areas. Use included stands for elevation.
– Strategic Placement: Position APs on shelves, bookcases, or wall-mounted floating shelves (secured with removable adhesive strips). Avoid metal surfaces.
– Document Everything: Take photos before moving in and after setup. Note original cable placements. This protects your security deposit.
Landlord Communication Approach:
“Hi [Landlord Name], I’m setting up a reliable home office network required for my remote work. I’ll be running a thin, flat cable along the baseboard from the modem location to my desk—secured with removable adhesive clips that won’t damage paint. I’m happy to provide photos of the method beforehand and will remove everything cleanly upon moving out, restoring the area to its original condition. This avoids any need for drilling or permanent changes. Please let me know if you’d like to discuss further!”
Why it works: Positions the request as necessary, emphasizes non-invasiveness, offers transparency, and reassures about restoration.
Taming Legacy Homes: Brick, Plaster, and Character Walls
Older homes present unique challenges—but adaptable solutions exist.
Understanding Historic Construction:
– Plaster & Lath: Older plaster (pre-1950s) often contains materials that block Wi-Fi more than drywall.
– Brick/Stone Walls: Very dense. A single exterior brick wall can significantly reduce signal.
– Metal Pipes/Ducts: Common in older homes; can reflect or block signals.
– Limited Access: Finished attics or slab foundations restrict routing options.
Adapted Strategies:
– Focus Wired Efforts: Prioritize one strategic Ethernet run (e.g., basement utility area up through a closet to the main TV). Even one run makes a difference.
– AP Placement is Critical:
– Place APs between problem walls. If brick walls separate rooms, mount AP in the doorway/hallway.
– Use interior walls (less dense than exterior), near stairwells, or inside cabinets with mesh fronts.
– Avoid placing APs directly against exterior brick walls—they’ll radiate signal outside.
– Leverage Existing Pathways (Cautiously):
– Old telephone or cable lines? Carefully pull new Ethernet through the same path (use a fish tape).
– Consult a professional before using unused fireplace flues or HVAC vents for runs. Safety first.
– Specialized Options:
– Directional Antennas: Some business APs allow swapping antennas to focus signal through a specific wall.
– MoCA Adapters: If your home has unused coaxial cable lines running to multiple rooms, MoCA adapters can use existing coax for Ethernet backhaul. Verify no active cable service on those lines first.
– Practical Compromise: In a very old stone home, perfect coverage everywhere may not be feasible. Prioritize: Ensure strong signal in home office and main living area. Accept that a root cellar might have weaker signal—and use a wired connection for any critical device there.
Advanced Scenarios: Solving Complex Household Challenges
Your home isn’t a textbook diagram. Let’s tackle nuanced situations where standard advice falls short.
The Multi-Generational Household: Balancing Needs and Privacy
Challenge: Grandparents need simple, reliable video calls; teens demand low-latency gaming; parents require secure work access; smart home devices proliferate. Conflicting needs create network complexity.
Solution Framework:
1. Network Segmentation is Key:
– Work VLAN: For parent devices. Highest priority QoS, isolated traffic.
– Family VLAN: For teens’ gaming consoles, personal devices. Moderate QoS priority.
– Elder Care VLAN: For grandparents’ tablets/phones. Simplified SSID name (“Family Network”), strong signal in their rooms, optional content filtering.
– IoT VLAN: All smart devices. Restricted access to other networks.
– Guest VLAN: For visitors. Time-limited access codes if supported.
2. Device-Specific QoS Rules:
– Prioritize grandparents’ tablet during typical call hours.
– Cap bandwidth for gaming consoles during homework hours if desired.
– Schedule non-essential device updates for overnight.
3. Physical Setup:
– Place an AP near grandparents’ primary seating area. Provide clear, simple instructions.
– For high tech anxiety, a separate, simple router just for grandparents’ devices (connected to the main network) can reduce stress.
4. Clear Communication:
– Create a one-page “Network Guide” with large fonts: SSID/passwords, who to contact for help, basic steps (restart modem).
– Schedule brief monthly check-ins to update devices and address concerns.
Outcome: Each household member experiences a network tailored to their needs without compromising others’ performance or privacy.
The Hybrid Work Power User: Prioritizing Reliability
Challenge: Video conferences with global teams, large file transfers, cloud-based applications, VoIP phone system. Downtime impacts work. Buffering is disruptive.
Solution Framework:
1. Connection Redundancy (If Critical):
– A business-grade router with two WAN ports allows connecting primary internet (fiber/cable) and a secondary connection (5G/LTE hotspot). Configure failover to switch traffic if the primary drops.
– Budget Alternative: Some routers support USB 4G/5G dongles as a backup connection.
2. Wired-First Practice:
– Desktop workstation, VoIP phone, and primary monitor should be Ethernet-connected.
– Use a USB-C dock with Ethernet for laptops to encourage wired use at the desk.
3. Traffic Prioritization:
– Identify critical applications (e.g., Zoom, Teams) and prioritize their traffic via QoS rules.
– Set VoIP traffic to highest priority—voice packets get through even during large downloads.
– Schedule large backups/uploads for after work hours.
4. Proactive Monitoring:
– Tools like PingPlotter can monitor latency to key servers. Alerts if metrics degrade.
– Log uptime statistics; useful when discussing issues with your ISP.
5. Physical Safeguards:
– UPS battery backup for modem, router, switch. Keeps network alive through brief outages.
– Keep a spare router/AP configured for quick replacement if hardware fails.
Outcome: A network designed for consistent performance during critical work tasks. Confidence to take important calls knowing the infrastructure is stable.
The Smart Home Ecosystem: Scaling Without Chaos
Challenge: 50+ devices (lights, locks, cameras, sensors, hubs). Network slowdowns, devices dropping offline, security concerns. “Smart” feels unreliable.
Solution Framework:
1. IoT Network Segmentation (Highly Recommended):
– Create a dedicated VLAN just for IoT devices. Restrict inbound internet access to this VLAN—devices only communicate outbound to their services. This contains potential issues.
– Further segment if needed:
– Cameras VLAN: Isolated, with firewall rules allowing only outbound to NVR/cloud.
– Critical IoT VLAN: Smart locks, security sensors—prioritized traffic.
– Non-Critical IoT VLAN: Lights, plugs—can be throttled during peak hours.
2. Hub Strategy:
– Prefer hubs supporting local control (Home Assistant, Hubitat) over cloud-dependent ones. Reduces latency and works during internet outages.
– Place hub on a wired connection. Ensure it’s on the same VLAN as devices it controls.
3. Device Management Protocol:
– Onboarding: Change default passwords, update firmware, assign static IP (via DHCP reservation), move to correct VLAN.
– Quarterly Audit: Review all IoT devices. Factory reset and remove unused devices. Check for firmware updates.
– Retirement Policy: Replace devices that no longer receive security updates (common after several years).
4. Bandwidth Management:
– Limit camera upload speeds to prevent saturating upload bandwidth.
– Schedule non-essential device updates for overnight.
– Disable cloud features on devices that support local-only operation where possible.
5. Alternative Protocols:
– For dense sensor networks (motion, door/window), consider Zigbee or Z-Wave mesh protocols. They use minimal Wi-Fi bandwidth, have good wall penetration, and create a self-healing mesh. Requires a compatible hub but reduces Wi-Fi congestion significantly.
Outcome: A responsive, secure smart home where devices work reliably without bogging down your main network. Reduced “smart home fatigue.”
Your Questions, Answered
Q: Do I really need to run Ethernet cables? Can’t a good mesh system handle everything wirelessly?
A: For smaller homes (<1,800 sq ft) with open layouts and minimal obstructions, a premium tri-band mesh system (using a dedicated backhaul band) can deliver very good results. However, physics is a factor: every wireless hop between nodes consumes bandwidth and can introduce latency. In larger homes, multi-story layouts, or buildings with dense materials (brick, concrete), Ethernet backhaul between access points is generally the most reliable way to ensure consistent performance and seamless roaming. Think of wireless mesh as a capable solution for situations where running cable is truly impractical—not the ideal foundation for maximum reliability. If you can run even one critical cable (e.g., to your main TV or office), it often provides a noticeable improvement during demanding tasks like 4K streaming or video calls.
Q: My internet speed test shows 500 Mbps, but my Wi-Fi only gets 150 Mbps on my phone. Is my router broken?
A: Likely not. This is commonly a case of confusing internet speed with local Wi-Fi speed. Your speed test measures the connection to your ISP. Your phone’s Wi-Fi speed depends on distance from the access point, walls in between, interference, and crucially—your phone’s own Wi-Fi capabilities. Many phones have hardware limits (e.g., supporting only 2×2 MIMO on 5GHz), capping real-world speeds well below the internet plan speed. To diagnose:
1. Run a speed test while connected via Ethernet to your router. If it shows ~500 Mbps, your internet and router are functioning correctly.
2. Move your phone within 10 feet of the access point with clear line-of-sight. Retest Wi-Fi speed. If it increases significantly, the issue is coverage—not the router.
3. Check your phone’s specifications. Older devices have inherent limitations. Solution: Improve coverage (add an AP) or accept that mobile devices will typically have lower speeds than wired connections. Focus on whether performance feels sufficient for your tasks.
Q: Should I use the Wi-Fi router provided by my ISP?
A: Often, purchasing your own certified modem and separate router/AP system provides better performance, security control, and long-term value. ISP-provided gateways are designed for low cost and remote management, not necessarily optimal home performance. They may run outdated firmware, have weaker Wi-Fi radios, or lack advanced features. The exception: Some ISPs now offer competent Wi-Fi 6 gateways. If you choose to use it:
1. Enable bridge mode and connect your own high-quality router/AP system behind it. This disables the ISP unit’s Wi-Fi and routing functions, using it purely as a modem.
2. Change all default passwords immediately.
3. Verify firmware update practices.
Calculate the rental fee savings—many setups pay for themselves in under two years. Always confirm compatibility with your ISP first.
Q: How often should I reboot my modem and router?
A: Modern networking gear is designed for continuous operation, but periodic reboots can clear temporary glitches. A practical schedule:
– Monthly: Reboot both modem and main router/AP. Unplug power for 30 seconds, then restore. Best done during low-usage times.
– As Needed: Reboot immediately if you experience sudden slowdowns, intermittent disconnects, or devices can’t obtain IP addresses.
– Avoid Frequent Reboots: Daily or weekly reboots aren’t necessary with quality hardware and can stress components. If you require frequent reboots to maintain stability, it may indicate a deeper issue: overheating (improve ventilation), a firmware bug (check for updates), or hardware failure.
Pro Tip: Some gear has built-in scheduled reboot features. Or use a smart plug to automate a monthly reboot at 3 AM.
Q: Is Wi-Fi 6E or Wi-Fi 7 worth upgrading to now?
A: It depends on your current experience and device ecosystem:
– Wi-Fi 6E (Adds 6GHz band): Consider if:
– You live in a dense area (apartment building) with heavy 2.4/5GHz congestion
– You have multiple Wi-Fi 6E devices (recent high-end phones, laptops)
– You need very low latency for VR, cloud gaming, or high-resolution streaming
The 6GHz band is typically less congested. If your current setup works well and your devices don’t support 6E, waiting is reasonable.
– Wi-Fi 7: Not urgent for most households yet. Benefits require both router and client devices to support Wi-Fi 7. Ecosystem adoption will take time. Ideal for early adopters with specific high-demand needs and compatible devices. For most homes, a quality Wi-Fi 6 system provides ample performance today. Upgrade when your current gear reaches end-of-life or when you accumulate multiple Wi-Fi 7 devices.
Strategic Advice: Prioritize systems with a clear upgrade path over chasing the absolute latest standard. Future-proofing means scalable architecture—not just specs.
Q: How can I tell if my neighbor’s Wi-Fi is interfering with mine?
A: Interference is common in dense neighborhoods. Diagnose with these steps:
1. Install a Wi-Fi analyzer app (NetSpot, WiFi Analyzer).
2. Walk near shared walls/windows. Note:
– Channel Overlap: On 2.4GHz, are multiple networks using the same channel (1, 6, 11)? Overlap causes collisions.
– Signal Strength: Do neighbors’ networks show strong signals (-60 dBm or higher) in your space?
3. Symptoms of interference:
– Speeds drop at certain times of day
– Latency spikes during video calls
– Devices disconnect randomly
Solutions:
– 2.4GHz: Manually set your router to the least congested channel (1, 6, or 11).
– 5GHz/6GHz: Enable DFS channels if your router supports them. These are often wider and less crowded.
– Physical: Reposition your AP a few feet away from shared walls.
– Strategic: Move non-IoT devices aggressively to 5GHz/6GHz bands where possible—less prone to interference than crowded 2.4GHz.
You can’t control neighbors’ networks, but you can optimize yours to coexist more effectively.
Q: What’s a common mistake people make when setting up home networks?
A: Placing the router or modem in a convenient but signal-obstructing location—typically stuffed inside a closed entertainment cabinet, a basement corner, or a closet. Wi-Fi signals are easily blocked by wood, glass, and especially metal. A cabinet can act like a shield. Basements suffer from floor penetration loss. Closets have dense contents. The fix is often simple but critical: Place your main access point (or mesh node) centrally, elevated (5–7 feet high), in open air, away from large appliances and metal objects. If aesthetics are a concern:
– Mount it discreetly on a wall behind the TV (facing outward)
– Place it on a high shelf in a bookcase (not enclosed)
– Use a ventilated decorative box designed for routers
This single adjustment resolves more coverage issues than expensive hardware upgrades. Always optimize placement before considering new gear.
Q: How do I secure my network without making it complicated for family members?
A: Security and usability can coexist. Implement these layered, low-friction practices:
1. Strong Foundation: WPA3 (or WPA2-AES) encryption, unique complex Wi-Fi password, changed admin password.
2. Network Segmentation: Create a separate “IoT Network” for smart devices. This contains potential issues—if a smart plug is compromised, it can’t access your laptop on the main network. Most modern systems set this up easily.
3. Guest Network: Enable it! Give visitors a separate password. Disable “local network access” so they can’t see your printers or storage.
4. Automatic Updates: Enable firmware updates on all networking gear. Critical vulnerabilities get patched this way.
5. Simple Monitoring: Use the Fing app to get alerts when unknown devices join. Review the list monthly with family (“Do we recognize these devices?”).
Avoid overcomplicating: Use a memorable but strong passphrase for the main network (“BlueCoffeeMug$Rains!”). Focus on segmentation and updates—they provide significant security benefits with minimal daily friction.
Q: My smart home devices keep disconnecting. Is this a Wi-Fi problem or device problem?
A: It’s often a combination, but Wi-Fi coverage is a frequent culprit for intermittent disconnects. Smart devices (especially budget IoT) have less robust Wi-Fi radios and struggle with:
– Weak Signal: Below -70 dBm, connections become unstable. Use your Wi-Fi analyzer app to check signal strength at the device location.
– Channel Congestion: Too many networks on the same channel cause packet loss. Switch to a less crowded channel.
– 2.4GHz Band Saturation: Many IoT devices only use 2.4GHz. If you have many devices on this band, it gets noisy. Solutions:
– Move non-IoT devices (phones, laptops) to 5GHz/6GHz
– Enable band steering on your APs
– Consider Zigbee/Z-Wave for sensors/lights (uses separate hub, less Wi-Fi load)
– Router Overload: Very cheap routers may struggle with 30+ device connections. Upgrade to a system designed for higher client counts.
Diagnostic Step: Temporarily move the problematic device close to your main AP. If disconnects stop, it’s likely a coverage issue. If they continue, the device itself may need a firmware update or replacement. Prioritize fixing coverage first—it resolves most IoT reliability issues.
Q: Should I disable the 2.4GHz band to improve performance?
A: Generally, no. While 5GHz/6GHz offer faster speeds and less interference, 2.4GHz has superior range and wall penetration. Disabling it creates new problems:
– Many essential devices only support 2.4GHz (older smart plugs, sensors, printers, some security cameras). They’ll stop working.
– In larger homes, 2.4GHz may be the only band reaching distant areas. Disabling it creates dead zones.
– Modern networks use “band steering” to guide capable devices to 5GHz while leaving 2.4GHz for legacy devices. This optimizes airtime.
When to consider disabling 2.4GHz:
– You live in a small space with all modern devices (all support 5GHz+)
– You experience severe, unresolvable interference on 2.4GHz
– You’ve verified every single device works on 5GHz
Best Practice: Keep 2.4GHz active but optimized. Use your Wi-Fi analyzer to select the cleanest channel (1, 6, or 11). Reduce transmit power slightly to minimize overlap with neighbors. Let band steering manage device distribution. This balanced approach maximizes compatibility and performance.
Q: How do I choose between a mesh system and multiple access points?
A: The decision hinges on three factors: your home’s layout, existing wiring, and comfort level:
| Factor | Choose Mesh System If… | Choose Dedicated APs If… |
|——–|—————————|—————————-|
| Wiring | No Ethernet runs possible between nodes | You have (or can run) Ethernet to AP locations |
| Home Size/Layout | Under 2,500 sq ft, relatively open | Over 2,500 sq ft, multi-story, dense walls |
| Performance Need | Good for streaming, browsing, light work | Critical for WFH, gaming, 4K/8K streaming, large file transfers |
| Management | Prefer simple app-based control | Want centralized control, advanced features (VLANs, QoS) |
| Budget | $200–$500 for complete system | $300+ (cost scales with AP count) |
| Future Proofing | Limited upgrade path | Easily add more APs; components often last longer |
Key Insight: Some mesh systems (like Eero Pro 6E) support Ethernet backhaul. Start wireless, then run cable later to convert nodes to wired backhaul for a performance boost. If you anticipate needing robust coverage long-term, dedicated APs on Ethernet generally provide superior reliability and control—but require more initial setup effort. For new builds or major renovations, wiring for APs is a professional-grade choice. For existing homes where cable runs are impractical, a premium tri-band mesh system is a capable solution.
Q: What’s an often-overlooked aspect of home network setup?
A: Documentation and labeling. When networks are simple, it’s easy to remember connections. But as systems grow—more APs, switches, VLANs—chaos ensues during troubleshooting. Implement this quick habit:
1. Label Everything: Use a label maker on both ends of every Ethernet cable (e.g., “AP-LivingRoom,” “Switch-Port3”). Label power adapters (“Modem,” “AP-Bedroom”).
2. Create a Simple Network Diagram: Sketch a map: Modem → Switch → [AP Locations]. Note SSIDs, key settings (store passwords securely!). Update it when changes are made.
3. Keep a Configuration Backup: Export your router/AP settings periodically to a USB drive or secure cloud storage. If hardware fails, restoration is much faster.
This practice transforms stressful emergencies (“Which cable is which?!”) into calm, efficient repairs. It’s a hallmark of a well-managed network—accessible to anyone. Spend ten minutes upfront; thank yourself later during the inevitable “why is the internet down?” moment.
Conclusion and Your Path Forward
We’ve journeyed from fragmented frustration to a unified vision of home connectivity—a system designed not for peak speeds on a spec sheet, but for consistent reliability in daily life. Let’s crystallize what truly matters.
The Three Pillars Recap:
1. Foundation First: Your wired backbone isn’t optional infrastructure; it’s the strategic anchor that liberates wireless capacity and ensures critical tasks remain stable. One well-placed Ethernet cable often delivers more tangible benefit than any single router feature.
2. Coverage as Cartography: Wireless design is a spatial practice. Map your home’s unique signal landscape. Place access points to create overlapping zones of strong, clean signal—not like megaphones blasting indiscriminately. Connection quality matters more than signal bar count.
3. Intelligence Through Simplicity: True network intelligence isn’t complexity; it’s thoughtful automation. Segmentation contains risk. QoS prioritizes what matters. Monitoring replaces panic with awareness. These layers work silently so you rarely need to think about them.
This framework transcends specific products or fleeting standards. Whether new wireless standards emerge or fiber becomes ubiquitous, the principles of layered design, environmental adaptation, and user-centered management remain relevant. You now hold an adaptable methodology—not just a setup checklist—to evolve your network alongside your life.
The 24-Hour Rule: Your First Step to Clarity
Knowledge without action remains theoretical. Within the next 24 hours, complete this single, tiny action:
Grab your smartphone, open a Wi-Fi analyzer app, and walk through your home. Stand in each room where you use the internet. Note one location with consistently weak signal (below -70 dBm). Write it down.
That’s it. No purchases. No drilling. Just awareness. This single data point—your personal “pain point”—becomes the compass for your next decision. Maybe it’s where you’ll place a future access point. Maybe it’s where you’ll run your first Ethernet cable. Maybe it confirms your current setup is sufficient. Clarity replaces guesswork. Action follows insight. Start here. Build momentum.
The Bigger Picture: Your Home as a Living System
Your network is more than cables and radios. It’s the digital circulatory system of modern home life—enabling connection, creation, security, and comfort. When it functions reliably, it empowers everything else: the laughter during a video call with distant family, the focus during an important work session, the peace of mind from a security alert, the shared joy of a movie night. Investing thoughtfully in its reliability isn’t about technology for technology’s sake. It’s about removing friction from what matters most. It’s about designing a home environment where technology serves humanity seamlessly. You’ve taken the most important step: shifting from reactive troubleshooting to intentional design. Carry this mindset forward. Observe. Adapt. Build with purpose. Your reliably connected home awaits—not as a perfect destination, but as a continuously refined experience that supports your life.
Explore Our Complete System:
The Ultimate Guide to Home Office Ergonomics and Productivity | Smart Home Security: Beyond the Camera | Conduit and Cable Management for DIYers | Demystifying Internet Plans: Fiber, Cable, 5G Explained | Sustainable Home Tech: Reducing E-Waste and Energy Use | The Homeowner’s Guide to Low-Voltage Wiring | Troubleshooting Like a Pro: A Step-by-Step Diagnostic Framework